Showing posts with label technique. Show all posts

Tuesday, February 09, 2016

Hello Love: Heart Silhouette background layout

Hello all! Beautiful snow day here!! Great day to share with you my latest layout!!  Once again, I tried out a free cutting file for the Silhouette!! I knew it would be cute to use, but i fell in LOVE with this layout once I had completed it!! I'm sure the photos will not do it justice, but it's so full of dimension!  I'll share with you how I created it!!


 I'm not sure if you can tell by this photo, but each of the hearts are on the page using foam squares! This gave it so much dimension!! The image below shows you that a little better!!

Here's what I did to create this page....
  • Cut Heart Background from 12x12 white card stock. Remove from Silhouette cutting plate and adhere to background patterned paper. (My Minds Eye: Fancy That). Machine stitch edge. 
  • Cut Heart Background again, this time onto My Minds Eye: On Trend Ombre paper. 
  • Gently remove hearts from Ombre paper in order, and adhere to white background in the same order that you remove them. This will keep the ombre design perfect!!  I used Scrapbook Adhesives by 3L Large Foam squares, white for this. One square per heart!
  • Lightly sand edges of 3x4 photo and matt with white card stock.  Add a black matt, slightly smaller, and offset. Layer using 2 Jillybean Soup White frames, each offset. Add black and white washi tape to a strip of white yardstick. Slide in under photo to the right. 
  • Die cut title in Silhouette using Dancer Script from black card stock. 
  • And really, the embellishing is up to you! I added the LOVE sticker to a chipboard arrow (My Minds Eye: On Trend). I printed my journaling in a script font to match my title, cut into strips and added that. I finished off with some added embellishments (see list below). 
This page was not at all complicated! it was a little bit time consuming, replacing the hearts, but other than that, it came together in a flash.


Did I mention that I'm LOVING, loving LOVING! my Silhouette??? If not... I LOVE MY SILHOUETTE!!! ;)
Supplies: 
Background Cut File: Birds Cards Heart Background  FREE Download!!
Font: Dancer Script
Patterned Paper: My Minds Eye: On Trend, Fancy That (see exact links above)
Card Stock: Spellbinders Whirl White, Worldwin Papers:Black
White Frames: Jillybean Soup
Embellishments: Freckled Fawn: Cork Hearts; Simple Stories clear stickers; MME Enamel Dots; MME Chipboard; Crete Paper puffy stickers; Metal clip (unknown), Washi Tape from Blitzy
Adhesive: Scrapbook Adhesives by 3L: White Large foam Squares, Adhesive Runner 

So that's it for today! Loving all these heart pages! Hope to have at least one more before the weekend!! Time will tell. if not, it's ok to do heart pages after Valentines, don't ya think??
So, until next time, Happy Creating!!

Wednesday, February 03, 2016

Be Awesome: Keeping it simple

Hello all! What a week last week was! Wow!! On the road every single day! I don't do well with that... Home life is too busy to be on the road each day! That being said, I have been getting some creating done, but not getting to share it! So I'm here today to share a layout that I created with you. Just for me. YEAH!!!
This page was designed with white space in mind. The focus was the photo. A small black and white photo of my daughter before her dance competition a couple of years ago.

To accent the photo, I first added some watercolour paint behind where the image would go. I used some green, teal and purple. The color inspiration came from the floral die cut! Worked perfectly! And while the diet had gold tracing the design, I decided to pull that into my design as well... in the title as well as in the chipboard frame.


To accent the photo, I layered up a chipboard frame and some wash tape along with a few simple embellishments. Nothing fancy or overdone... really really simple. But yet i absolutely love the effect. And of course a nice swirly title finishes it off perfectly! :)
Thanks for stopping by! I have a process video in the works for a Bible journaling page... again, being on the road so much takes away my video editing time. ;) So stay tuned for that to come hopefully later this week!!
Here's the supply list for today's project!

Supplies:
Card Stock: Spellbinders Whirl White yardstick
Watercolour Paints: Artists Loft (Michaels)
Wash Tape: Blitzy
Title: Jen Hadfield for Pebbles Puffy Phrase Stickers
Embellishments: Fancy Pants chalkboard tags, MME Metal clip, Dear Lizzy Diecut flower: Crate Paper Citrus Bliss Sticker, and frame

Thanks again for stopping by!
Until next time... Happy Creating!

Wednesday, April 15, 2015

Home is where you are... Featuring Spellbinders

Neighbourhood Glance is an adorable new die set just reeled from Spellbinders.  Today, I will show you how to use it on a scrapbook page and add lots of layers, depth and dimension. After they have been cut, I coloured them using Chameleon Alcohol markers to bring them to life!!
But to see the entire project, with full instructions, you will have to stop by the Spellbinders blog... because here I'm only giving you a sneak peek!! :)

Spellbinders Supplies:

Cross Promotional Partner Products:

Other Supplies:

Patterned paper; Scissors, Hole punch, Black pen, Cardstock (black, white), Stickers, Wood embellishments, Decorative clothes pin, White cardboard


This set of dies is so much fun! It is so versatile and can be used in so many types of projects! Off the top of my head I'm thinking of themed projects saying  "Welcome Home", "Welcome to the Neighbourhood", "Missing You Here", Housewarming gifts... endless possibilities!! In scrapbook pages, cards, party decor...
Thanks so much for stopping by today!!
Until next time,
Happy creating!!

Thursday, November 20, 2014

Spellbinders Holiday Greetings, Advanced project

as promised, I am back!! :) Wow! 4 posts in 3 days! i could get used to this!! LOL!!
For today I have an advanced project for you that I created, once gain, using Spellbinders Holiday Greetings.

Let me share a bit about this die... I chose it because I thought it was be very challenging for me. I was right... but in the end it was SO easy to work with!! And the possibilities are endless!!!!!
Here is what I did for the most complicated project... it may not look that difficult, but in having to create only partial cuts, it definitely takes some experience and patience. :) But it's worth it, as I really love how it turned out!!
NOEL Holiday Gift Set

You can see FULL instructions, with photos on the official post on the Spellbinders website HERE.
Here is what I used to create this...

Spellbinders Supplies:

  • S4-434 Holiday Greetings
  • SCD-010 Build-a-Tag One
  • T-001 Tool 'n One™
  • GC-001 Spellbinders® Grand Calibur® Die Cutting and Embossing Machine

Other Supplies:

  • ClearSnap: Glitter
  • May Arts: White Ribbon and Iridescent Cord
  • Scrapbook Adhesives by 3L®: Adhesive Sheet, E-Z Runner® Permanent Strips and 3D Foam Squares
  • White Cardstock
  • Red Cardstock
  • Green Cardstock
  • Hole Punch
  • Box
  • Low Tack Tape
Thanks again for stopping by!!! I think I'm going to have to do a giveaway coming up soon... so stay tuned!!!
Until next time...
Happy Creating!!

Wednesday, November 19, 2014

Spellbinders Holiday Greetings: Intermediate project

Good morning! I am back today as promised to share with you the intermediate level project created for Spellbinders Feature Gallery using the beautiful Holiday Greetings die template.
Holiday Greetings: Advanced

Glittered Greetings
I creating this project, I used the entire die template. I backed each element using a different coloured glitter paper (Core'dinations) as well as matted the entire card front in a blue glitter paper. Then, to add some dimension, I die cut the snowflake layer again and popped up the snowflakes. Pearls were added to the flakes and the tree tops. A beautiful ribbon and floss from May Arts grace the front and is finished off with a Flower center from Zva Creative.

For full instructions see the official post HERE.

Spellbinders Supplies:

  • S4-434 Holiday Greetings
  • Junior Metal Shim
  • GC-001 Spellbinders® Grand Calibur® Die Cutting and Embossing Machine

Other Supplies:

  • Core’dinations ColorCore Cardstock®: Glitter Cardstock (Green, Gold, Light Blue, Blue and Red)
  • May Arts: White Ribbon, iridescent floss
  • Scrapbook Adhesive by 3L®: Crafty Foam Tape and E-Z Runner® Permanent Strip Adhesive
  • Want2Scrap©: Self-Adhsive Baby Pearls
  • American Crafts: White Cardstock
  • Zva Creative: Red Gem
To see the third and final project in this set, stop by tomorrow!! I will be sharing an advanced project, for those with a bit more time, patience and experience who want to try something a little different.
Until then,
Happy Creating!!

Monday, October 20, 2014

Fall Inspirations with Imagine Crafts

Hello all!! Today I am sharing a beautiful fall colour scheme and technique for creating those Fall Inspired projects!! I have a full video tutorial walking you thru the steps. I have created this project using dies from Spellbinders, The gorgeous stamp from Quietfire Designs, and inks/sprays, etc from Imagine Crafts!!

And here is the full video tutorial!! Enjoy!


I had a lot of fun with this project!! :) I hope it inspires you!! I'm totally hooked on creating fall inspired projects right now!! :)  A HUGE thank you to Suzanne from Quietfire Designs for providing this gorgeous stamp for today's project!! :)
I'd love to hear your thoughts and see what you are working on!! Leave me a link in the comments section and I'll stop by your blog and leave you some loving!!

Thanks for stopping by!
Until next time, Happy Creating!!

Wednesday, September 17, 2014

IMAGINE Crafts and Magenta blog hop!!

Magenta_badge 
 Welcome to a week of fantastic collaboration between IMAGINE Crafts and Magenta Rubber Stamps! Both companies are excited to share with you their products, from the latest inks from IMAGINE Crafts to the newest Fall and Holiday stamp releases from Magenta.      

Today I am sharing with you a video tutorial on how to re-create this card! 
 For this project I have used the following Magenta stamps:

 And here is the promised video tutorial!! Enjoy! 
Full product list is found at the end of this blog post.


And here is another card I created using
 all 3 of the Magenta stamps along with IMAGINE Crafts Embossing powders!! . 
This time onto grey card stock. I love how well they stand out!!


Prizes galore for participating in the Blog Hop this week!

IMAGINE Crafts and Magenta are offering a total of three different prizes this week as part of this Blog Hop. These prizes include IMAGINE Crafts' irRESISTible Texture Spray, irRESISTible Pico Embellisher, Delicata Shimmery Silver and Golden Glitz AND some of the newest releases from Magenta. Take a moment to visit the other featured artists' blogs listed below and leave a comment on their posts by midnight PST September 21st. Three winners will be randomly selected from three different blogs from the seven days of the Hop, with one commenter from each blog draw as the winner.   

Presenting the other featured projects for today:

Magenta_Hop_John

John Creighton Petersen

 
Magenta_Hop_Bianca_3

Bianca van Noort

 
Magenta_Hop_Cassandra_ATC

Cassandra DeGrace

 
Magenta_Hop_Ellie_2

Ellie Knol

 
Blog Hop Hint – if you click on a link that takes you to a page saying something like, “Sorry this page cannot be found,” just click on the header at the top of the blog (usually a picture, or the blog’s name), and it will take you to that blog’s most recent post. That post *should* be our hop. If not, you can probably scroll down a short way to find the hop post.

Supplies:
IMAGINE Crafts/Tsukineko: Memento (Pistachio, New Sprout) Versafine (Onyx Black), VersaMark, Foam Daubers, Irridescent Embossing Powder
MAGENTA Rubber Stamps: Sentiment (C07834F) Flowers (C48011L) and bird (C42196D)
Spellbinders: A2 Curved Matting Basics A and B
American Crafts: Cardstock 
Gems

Thanks so much for stopping by!! Now continue to hop on over to the next blog!!

John Creighton Petersen

Until Next Time,
Happy Creating!!


Wednesday, September 10, 2014

Spellbinders Cherry Blossoms Video Tutorial

Good morning all!!
Today I'm excited to share with you the brand new CHERRY BLOSSOMS dies from Spellbinders! They are now on Preorder and I'm not sure the shipping date. But they are worth waiting for!!!
Here is a project that I created with them.
And here is a full HOW TO VIDEO for how to make the Cherry Blossoms!
Thanks so much for stopping by!!!
I have another video tutorial to share with you soon using more of Spellbinders New Release dies!!!
Until then,
Happy Creating!!

Sunday, July 20, 2014

ENCORE! ultimate Metallic inks by IMAGINE Crafts

Hello!!! i hope you are enjoying your summer! i know I sure am! It's busy busy busy! But it's wonderful!!
I haven't been posting as much as I should be. :) I have been doing lots of creating though!!
Today is my day to share on the IMAGINE Ctafts/Tsukineko blog!! I am  showcasing their ENCORE! Ultimate Metallic inks.


I created a full video tutorial ask well, so enjoy!!

Thanks again for stopping by! Enjoy your summer!!
Until next time,
Happy Creating!!

Thursday, July 17, 2014

Dandylion Missing You card

Hello all!!! I hope that you are enjoying your summer!! I know we are here! It's busy but we're enjoying it!!
Today i have a fun and simple card to share with you  that I created for IMAGINE Crafts. It has a full video tutorial as well! So get comfy, and enjoy!!!


Don't you LOVE that Dandylion die!!??? Spellbinders does it again!!


Thanks so much for stopping by!
Until Next time,
Happy Creating!!!

Tuesday, June 17, 2014

"TOGETHER" A scrapbook page for Zva Creative


Good morning friends!!! I'm here today to share with you a scrapbook page that i did for Zva Creative!! I LOVED using the bling on a masculine layout!! It worked!! i was always hesitant to do it, for fear it would look too girly! What do you think?? Does the orange bling work for boys??

In creating this page, I began with a piece of plain white card stock. Using a paintbrush, IMAGINE Crafts Radiant Neon Inks, and Ink Potion #9, I created the fun paintbrush colours on the background! I loved the effect!!  Then I splattered some Tuxedo Black irRESISTibles . I layered up some papers and a polaroid frame, added a circle from Spellbinders® Grand Circles, and a few odds and ends. The butterflies are Spellbinders Butterfly Corners set, and the title is a digital cutting file (Not sure what, as it was given to me).  And of course, the Zva bling!!! I really loved how this turned out, and it was SOOO fast!! Actually, I created 2 pages that afternoon in about 2 hours! I think that's a record for me!! :)
Here's the supply list!!

  • Zva Creative:
    •  CRB-07CA-106 Large orange flourish
    • CRW-07CA-146
  • IMAGINE Crafts
    • Radiant Neon reinkers (Electric blue, electric green, electric yellow, electric pink, electric orange)
    • Ink Potion #9
    • irRESISTibles, Tuxedo Black
  • Spellbinders®
    • Grand Circles
    • S5-165 Butterfly Corner
    • Grand Calibur Machine
  • American Crafts: 
    • White card stock
  • Simple Stories
    • SNAP! 4x6 cards
  • Jillibean Soup
    • White frames
  • Other: Stickers, adhesive, title, paint brush

Thanks so much for stopping by!!! More creative projects to come!!
Until Next Time,
Happy Creating!!

Saturday, May 31, 2014

IMAGINE Crafts and Viva Las VegaStamps! Blog hop

Mixed Media Blog Hop
Welcome to the IMAGINE Crafts and Viva Las VegaStamps! Blog Hop. For the next week, our two design teams will be featuring some amazing projects featuring products from both our companies. Amazing stamps require amazing ink, right?  (Today is the last day of the hop!)

Mixed Media Prize Package

We're proud to announce your chance to win one of three different Mixed Media Prize Packages from IMAGINE Crafts and Viva Las VegaStamps! You have until midnight PST on Sunday, May 31st 2014 to comment on as many of the Design Team Blog Posts from this week as possible. On Monday, June 1st we’ll draw three random blog posts and one comment from each of those posts will win a prize package!

Ready for some inspiration from our artists?

Here's today's posts from IMAGINE Crafts:

Tina McDonald THAT'S ME!!

And from Viva Las VegaStamps!:

  If you're just joining us on the Mixed Media Blog Hop, here' the links to the previous days posts: Saturday, Sunday, Monday, Tuesday, Wednesday, Thursday, Friday   ***Blog Hop Hint – if you click on a link that takes you to a page saying something like, “Sorry this page cannot be found” just click on the header at the top of the blog (usually a picture or the blog’s name) and it will take you to that blog’s most recent post. That post *should* be our hop. If not, you can probably scroll down a short way to find the hop post.


For my project, I created a mixed media scrapbook page! i LOVED this fabulous stamp and knew the minute I received it that I would use it on a scrapbook page!!!
Here's a basic "how to" in how I created it...

  • begin with solid background paper. Stamp checkerboard stamp from Viva Las Vegastamps! using Memento Luxe Black Tuxedo ink. i focused on the area around where my photo would go, as well as accent areas on the bottom. Open bottle of Tuxedo Black irRESISTible texture spray and "flick" some onto the page. Let dry.
  • Spritz Fireworks! spray in Summer Sky  while holding the paper up so that the colour will drip down the page.
  • Tear patterned paper strips and arrange to form a photo mat.  Lightly sand edges of 3x4" black and white photo. Mat with black card stock. Adhere using foam tape.
  • Diecut Spellbinders® A2 Modern Stationary by nesting dies together and die cutting using Grand Calibur® machine onto black card stock. Staple 2 of the frames together and add to the page.
  • Add flowers, clock cut outs, stickers, title, etc to embellish the page.
Supplies:
Thanks so much for stopping by!!! If you are not already following my blog, and you would like to, please follow using the links on the right side of this page.
Until next time...
Happy Creating!!

Monday, May 19, 2014

IMAGINE Crafts and Stampendous! blog hop


Stampendous and Imagine Crafts Header 
 Welcome to a week of fantastic collaboration between IMAGINE Crafts and Stampendous! We have to admit that our two companies were made for each other and we're proud to have shared a long relationship of working together.  After all, what are stamps with out ink?  The projects created by our artists this week feature IMAGINE Crafts Radiant Neon™ inks paired perfectly with coordinating colors of Fran•táge Color Fragments from Stampendous, along with some of their newest stamp designs and Stack Art kits.

Prizes galore for participating in the Blog Hop this week!

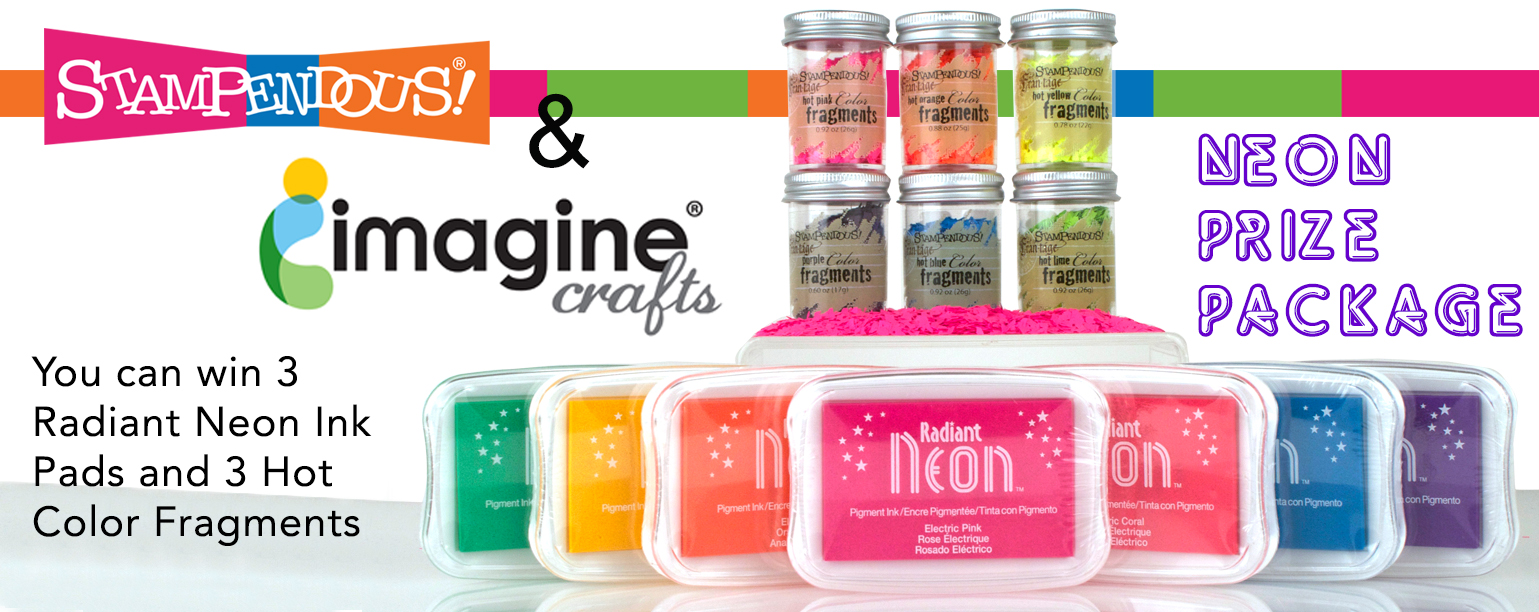
We'll be giving three prize packages of 3 Radiant Neon inks and 3 Fran•táge Color Fragments (we'll choose your colors). There will be a bright crafting future ahead of you! Each day we’ll post that day's participating artists.  Visit their blog and leave a comment by midnight PST May 25th.  We ‘ll randomly select three different blogs from the five days, then randomly draw one commenter from each blog. You must have a U.S. mailing address to win, but we’d love for everyone to hop and comment! You can check out the Official Rules for all our contests if you have questions. STM Imagine Crafts Prize Package 
 So are you ready for some exciting inspiration? Here's who is hopping today:

Kristine Reynolds

Isha Gupta

Tobi Crawford

Penny Ward

Janelle Stollfus

Linda Lucas

Tina McDonald (that's me!)


***Blog Hop Hint – if you click on a link that takes you to a page saying something like, “Sorry this page cannot be found,” just click on the header at the top of the blog (usually a picture, or the blog’s name), and it will take you to that blog’s most recent post. That post *should* be our hop. If not, you can probably scroll down a short way to find the hop post.

Now, on to my project!!  I have created a mixed media scrapbook page. And to show you just how I've done it, I created a short video tutorial for you!!! 

And here is the HOW TO video!! 
Thanks so much for stopping by today!! Don't forget to comment for your chance to WIN one of these AMAZING prize packages!!!! If you have any questions, be sure to leave your email address so I can contact you!
If you have enjoyed todays video and project, please follow my blog or subscribe. Also follow my You Tube channel to keep up to date on my video tutorials!

Until Next Time,
Happy Creating!!

Saturday, May 03, 2014

Happy National Scrapbook Day!!

Hello Friends!!! Happy National Scrapbook Day!! I hope you are getting some creative time this weekend!!
At the moment, the sun is shining... I'm home ALONE (Yeah, RARE thing!!), music playing, and I have a clean scrap table!! WOW!!!
So I wanted to share with you a scrapbook page that I created for Zva Creative for April!!!

Zva Product Used:
CRW-03CB-146 (Green Gems), 
CRS-07CB-114 (Crystal clear flourish), 
CRB-06CA-115 (Crystal clear flourish)

Other product used:
Various Patterned Paper
Bazzill Basics cardstock
IMAGINE Crafts/Tsukineko: Memento ink (Black Tuxedo), Fireworks! (Black Tuxedo)
Spellbinders® Grand Calibur® Machine, Die templates ( S5-151 Basic Lattice, S5-165 Butterfly Corner)
Cardstock stickers, digital die cuts (Frame and ALWAYS)

I LOVE adding lots of layers to my pages, in case you have not noticed! :) And the Basic Lattice die from Spellbinders is a FUN one to tear and add here and there. I also used it as a stencil! LOVE using things in different ways!!

Thanks so much for stopping by today!!! Happy Creating!!


Tuesday, April 22, 2014

Artist in Residence Kaleidacolor project Sneak peek

Hey all! Today I am sharing a project over on the Imagine Crafts blog! I am using the Fun and fabulous Kaleidacolor inks!!! i have a full video tutorial showing you how to create the entire project!!!
Take a peek!!
Some hop on over to the Imagine Crafts blog to see the entire project, including video!!!
Thanks for stopping by!
Have a fabulous day!

Monday, March 31, 2014


Zva Creative March DT Blog Hop!

Hello friends! Zva Creative and our talented Design Team welcome you to our March blog hop!  We are very excited to have you join us today and hope you are inspired all of the beautiful work that we are about to share!
The hop begins at Zva Creative’s Facebook page! Be sure head on over to check it out! You will also find a complete list of all the participating blogs there (in case there is a glitch along the way). 
As you know, Zva offers many beautiful color groupings for pearls, flowers and crystals.  If you like what you see along the hop you can find a list of stores and online retailers that sell Zva HERE.


In creating this project, I used some gorgeous new papers from Bo Bunny, some fabulous dies from Spellbinders and of course, some GORGEOUS bling and flowers from Zva Creative! 


To create my title, I used plain chipboard letters (unknown source), added copper embossing powder from Imagine Crafts/Tsukineko, and then stencilled thru a Crafters Workshop stencil with Black Staz On ink. LOVE how it turned out!!


If you would like to play along with our design team, just follow along the blog path.  I am linking to one of the Zva designers and that designer is linking to the next and so on. Be prepared to be inspired along the way!
The Blog Hop starts today, March 31st  and runs through midnight US Eastern Standard Time on Tuesday, April 1st. 
***Prizes***
Hidden on FIVE of the blogs along the way is a Zva Creative prize package! Winners will be randomly chosen after the hop is over. All you need to do is leave a comment on one post... you do not need to leave a comment on each and every designer's blog post to qualify. However, the more times you comment along the blog hop path, the more chances you will have to win. 
The 5 winners will be announced on Wednesday, April 2nd on Zva Creative’s Facebook page. We will do our best to notify each winner, but it's best if you can pop in to Zva’s page on Wednesday to see if you are a winner!
We also thought it would be more fun to add even more chances to win our blog hop prize!  To increase your chances of winning:
* Comment to let us know that you posted on your Facebook page about our hop (link to any of the blog hop posts)
* Comment to let us know that you "tweeted" about our hop (link to any of the blog hop posts)
* Comment to let us know that you asked your local store to carry Zva creative products.  If they already do, that's fantastic, maybe you can suggest other products that they don't carry.
*Hop over to Zva’s Facebook page and “like” our page or leave a comment there to tell us that you stopped by if you already like us there!
The blog hop begins here at  Zva Creative’s Facebook page. 
Your next stop is Anna Zaprzelska! Enjoy!
Thank you for joining us!
P.S. Mark your calendar to join us again on April 28th for next month’s hop.
________________________________________
 Blog Hop Order
Zva links to Emilia Stammler http://few-favourite-things.blogspot.com
Emmy links to Carole Maurin http://scrapalolette.canalblog.com
Carole links to Jolanda Meurs http://jolandameurs.blogspot.com 
Jolan links to Irene Tan http://scrapperlicious.blogspot.com
Irene links to Nicole Martel http://nicolemartel.blogspot.com
Nicole links to Tina McDonald http://tinamcd-mysanity.blogspot.com
Tina links to Anna Zaprzelska  http://ana-brises.blogspot.com
Anna links to Gini Williams Cagle http://www.ginicagle.blogspot.com
Gini links to Gine Silveira http://ginesscraproom.blogspot.com 
Gine links to Camila Borssoi http://scrapbookcomcamila.blogspot.com

Friday, March 07, 2014

Peacock Feathers using Imagine Crafts Vertigo

Hello Friends!! Thanks for stopping by today!! I have a SUPER fun tutorial to share with you today over on the Imagine Crafts blog! I ADORE how this project turned out!!!
I really wanted to get an iridescent look on my peacock feathers, and I feel I totally achieved that! What do you think?? Here's a peek...
To see a full video tutorial on how I created this card, please stop over to the IMAGINE Crafts blog. i would LOVE to have your feedback!!
Full product supply list is found at the end of the video.

Thanks so much for visiting!! You all mean so much to me, and I greatly appreciate all the comments, emails, etc that you give!!
Until next time,
Happy Creating!!

Friday, February 21, 2014

Imagine Crafts Mixed Media Layout Video Tutorial

Hey all!! Thanks for stopping by!! Today is my day to share a video tutorial on the Imagine Crafts/Tsukineko blog!!! i have created a mixed media scrapbook page... using a bunch of fabulous products, including the new Radiant Neon inks!!! THEY ARE SO MUCH FUN!!!


Here is a little sneak peek... to see the rest of the project AND the how to video, you'll have to drop by the Imagine Crafts Blog!!

Can't wait to hear what you think of it!!!
Thanks for stopping by!!
Until Next time...
Happy Creating!

Thursday, December 05, 2013

Holiday Planner vido tutorial

Hi everyone! As the Christmas season approaches, we can so easily get caught up in the rush and business of it all. I know ALL about it, let me tell ya!! :)
So today I want to share with you a cute Holiday planner that I created for Spellbinders. I have a full video showing you exactly how to recreate it!! It's a touch long, so grab a Cuppa your fav morning drink (or evening for my friends overseas!!) and join me for a few minutes this morning!

Thanks for stopping by!! Enjoy the hustle and bustle of the season... It's part of the fun... :)

Until Next time..
Happy Creating!!

Wednesday, October 09, 2013

Wishing You Well card Featuring Spellbinders NEW Blooms Four

Did you hear??????
Spellbinders has just released a new bunch of Die D-Lites!!! Can I just say how much I ADORE these dies!?!?! I HAD to show one of them to you right away!
 
Aren't they GORGEOUS!!?? Check it out all cut out and assembled! I cut it out of ivory cardstock and inked them with Tsukineko's VersaColor ink in Petal Pink! So pretty!!
 
I also played with some other fun dies, which I will show you in the video, along with a really cool technique using M-Bossabilities Folder, Score Pal's Score board, and curved boarders! See a close-up here...

So now that I've shown you all the details, let me show you the full project! :)
And here's my little video! PLEASE excuse the poor quality today. The sound is not great, and what I was seeing on my ipad is NOT what you are seeing... I was zoomed in, but YOU are seeing my messy table too!! LOL! But, like I said at the beginning, video blogging is unedited! :)
Here we go!

 
 Supplies:
Thanks so much for stopping by and for watching my video!!In case you have been avoiding leaving comments due to the word verification, I am happy to say that I have removed it! :) I am now moderating comments instead.
So comment away!! :)
Until next time,
Happy Creating!!