Wednesday, December 19, 2012

All Good things must come to an end...

Happy Snowy morning to you!! It is snowing beautifully here... kids have a snow day... and I'm going to do some cooking soon! :)
But first,, I have a few things to share with you to inspire you in your Holiday creating!
However... before I do, I want to let you know that this will be my final post for Xyron. WHAAA!! My term is just about up, and I have PAINFULLY decided not to reapply for the next term.
I did NOT make this decision easily. I have ADORED everything about being a part of this team. The product, my fellow team members, the partners, the organization... ALL OF IT!! a HUGE thank you to Julie and Beth for this opportunity! I really do hope that when life settles down a bit and I have a bit more time that I will be able to apply once again.
There are only so many hours in a day. And I have a million things I should be doing. My kids need their mama... I need more time with Hubby... and yes... my housework is getting behind...(to say the least!). When creating becomes a chore... it's time to make a change. And now is that time. I LOVE what I do... and I want to keep it that way. I have loved my time with Xyron, and I WILL be back...!!!

So on that note... I have 2 ornaments to share with you and a Christmas card!!
3D Glitter Ornament

Supplies:
Xyron 5" Creative Station
Spellbinders ANGLE APPROACH cut/fold/tuck dies
Best Creation glitter cardstock
Want2Scrap gem

Gift Box Ornament


Supplies:
Xyron Mega Runner
Spellbinders Bracket Edge Box die templates
Kaisercraft patterned paper
Ranger Distress ink (Frayed burlap)
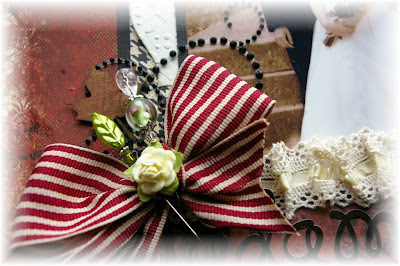
Unknown ribbon, lace and flower

 Spirit of Christmas card
Supplies:
Xyron "X" 1" machine
Bazill white cardstock
Quietfire designs stamp
Spellbinders die template
My Minds Eye patterned papers
ClearSnap black pigment ink
Want2Scrap red pearls

I hope you have been inspired by these creations!! If you are looking for more fabulous ideas, be sure to follow the Xyron facebook page, where there are TONS of amazing designs featured every week!
And I have a feeling there might be a Design Team call posted sometime in the coming months... so if you want to be apart of an AMAZING team... be sure to check it out!!
Thanks Again to Xyron!!! Love you!!! xoxo
Until next time...
Happy Creating!

Sunday, December 16, 2012

Spellbinders Explore Beyond: Craft to Win! CONTEST

Spellbinders is pleased to announce the BIGGEST contest we've hosted to date! Spellbinders Explore Beyond Challenge: Craft to Win a $5,000 Grand Prize Package from Spellbinders and our cross promotional partners! We'll also be choosing a 2nd place winner to receive a $1,000 prize package and a $500 3rd place prize package! Did I mention that this is the BIGGEST contest we've ever hosted!!!?! A BIG thank you to WorldWin Papers, Want2Scrap, Xyron, KaiserCraft, Scrapbook Adhesives by 3L, Basic Grey, Scrapbook & Cards Today Magazine, BoBunny, Fancy Pants Designs, Canadian Scrapbooker, Nikki Sivils, Elmer's, Bazzill Basics, Graphic 45, IMAGINE Crafts/Tsukineko and more!

How do you participate? It's easy!

Simply create an original project using at least two (2) Spellbinders dies. And get creative with it! Push your own creative boundaries...do something different. We'll be looking for those crafters and artists who have really taken on the challenge to truly "Explore Beyond".
Take photos of each step of your project. If chosen as a finalist... You'll be asked to submit these photos.
Submit a photo (of your finished project only!) to the appropriate Spellbinders Flickr Group.
Contest runs from November 26th, 2012 through December 26th, 2012 Midnight EST.

Categories:
Card Making
Home Decor
Scrapbook Layout
Jewelry Making
Fabric Arts
Mixed Media Art

Official Rules:
You may enter more than once in multiple categories. Projects entered must be original. A total of twelve (12) finalists will be chosen. There will be two (2) finalists from each category. Finalists will be announced on December 27, 2012. Finalists will be asked to submit photos of the steps of their projects to validate their originality. Finalists will be asked to mail in their final original project to the Spellbinders office. Original projects must be received by end of day, Friday, January 4, 2013.

A celebrity panel of judges will review the twelve (12) final submissions and narrow it down to three (3) winners. Winners will be announced on Friday, January 11, 2013. There will be one (1) Grand Prize winner of a $5,000 prize package and the project will be featured at the Spellbinders booth at the Craft and Hobby Association show on January 12, 2013. There will be one (1) 2nd prize winner of a $1,000 prize package and featured on the Spellbinders blog. There will be one (1) 3rd prize winner of a $500 prize package and featured on the Spellbinders blog.

Legal:
All federal, state and local taxes are the sole responsibility of the winners. By acceptance of the prize, winners agree without limitation to the use of his/her name, photograph and/or likeness for publicity purposes without any additional compensation. Winners agree to be bound by these rules and the decisions of the Spellbinders panel, which are final and binding in all matters regarding this event. Winners agree that the event and its representatives affiliates, agents, directors, officers and employees have no liability whatsoever for any injuries, losses or damages of any kind relating to or arising from this event or resulting from participation in this contest.Contest is not open to Spellbinders Employees, Various Team Members, or their immediate family members (Grandparents, Parents, Siblings, Spouses, Children).

Friday, December 07, 2012

Xyron and Basicly Bare

Hey everyone!
Are you getting ready for Christmas? I'm so behind this year for some reason!! However, I am just thrilled to have completed the project that I am going to share with you today! It makes me feel like I'm just a little bit ahead of the game... in one aspect anyway! :)
This week Xyron had the fabulous opportunity to partner with Basicly Bare! I was SO excited to get a totally cool package in the mail!! :) I created a December memory book with one of the pocket albums that I received! I know the December daily's are so popular, but I just don't have the time to do one and actually finish it! So, I decided to do an abreviated version. To highlight the main events of December!
Here's what I created!
I just LOVE how easy these albums are to decorate!! The possabilities are ENDLESS, as you have seen on the Xyron and Basicly Bare blog this week!
Instead of giving you step by step instructions on recreating my project, I'm going to give you tips for when you are creating your own album!!
  • When adding layers to a page, cut small pieces, rather than use full sheets of paper. This will save you a lot of paper in the end!
  • When inking the edges of your pages, always ink the inside edge before adhering to the chipboard, as it is not accessable once it is adhered. The other edges can be inked after they are adhered.
  • Cut all pieces of paper for a page and then run thru your Xyron machine of choice all at once. This will save you a lot of adhesive!
  • The beautiful Poinsietta on this page is a Spellbinders Paper Arts die template! Love it!! In my book I used a combination of premade diecuts (old ones that I had laying around) and some of my favorite Christmas sets from Spellbinders!
  • If desired, you could also add ribbon or little dangles to the spine. I decided not to, as I loved the elegant look!
I love the fabulous pockets in this album, but I wanted more, so I created my own pockets on the solid pages.
  • To create pockets, use your Xyron Mega Runner on 3 sides of your bottom piece of paper, keeping the top area adhesive-free.
  • I added a black strip of cardstock to help the beautiful Spellbinders diecut stand out. (Frosty Forms)
  • Spellbinders has some beautiful Label dies that are fabulous for creating tags! Here I used Labels Twenty-Five!
First pocket page in the album. Decorated simply.
  • I love that I can add as many tags, photo's, cards or memorabilia to these pockets as I want!
  • Try to keep the bulky embellies to a minimum, as this album is already thick and will not close well.
I LOVE this reindeer die from Spellbinders Frosty Forms die set!!!!!
  • Keep some areas available for photo's, journaling etc.
  • Lace... a fabulous addition to any page! I run it thru my Xyron 1.5" Create-a-sticker and it adhere's fabulously!!
  • When adhering diecuts with fine detail, run thru your Xyron machine of choice and remove clear covering. BUT before removing backing, rub gently with your hand to remove all the extra adhesive that you don't want to show thru the detailed areas! Like this reindeer's horns... No extra adhesive to stick to the next page!
  • Use up some of those precut stickers or diecuts by running thrm thru your favorite Xyron and layering them up! Add some pearls to add a touch of sparkle.
  • Simple background on this insert, as it will be covered in photo's.
Keeping it simple!

  • It's totally ok not to cover every area of the chipboard with paper! I love the look of the Kraft color coming thru!
  • More premade diecuts! Ink those edges, add some pearls!
  • This entire insert tag is ledger paper! Perfect for journaling on!


Great page for some photos!
  • Another example of detailed dies. Rub adhesive off the front before removing backing!
  •  More ribbon! Run it thru that "X!!


Some pages may seem pretty bare, but they certainly won't after the Christmas season is over!!! Tons of pictures, journaling and memories will fill every space available... and more!

Big thank you to Basicly Bare for the opportunity to participate in this blog hop!! I still have more goodies from them as well, so I'll be sharing those here on the blog whenever I use them!!
If you have not stopped by the Xyron blog, you might want to do so... there's a giveaway!!
Until next time...
Happy Creating!!

Supplies:
Xyron 9" Creative Station, 5" Creative Station, 1.5" Create-a-Sticker, Mega Runner
Basicly Bare: Pocket album
My Minds Eye Patterned papers and die cuts (numerous collections!!)
Bazill: Kraft and black Cardstock, patterned paper
Bo Bunny: Ribbon, charm
The Twinery: Twine
lace
Want2Scrap; pearls and jewels


Saturday, November 24, 2012

Xyron, Creative Imaginations and Faber Castell

Hey! Thanks so much for stopping by! Today I have the honor of showing you some projects that I did using products from a partnership between three AMAZING companies!! Xyron, Creative Imaginations and Design Memory Craft, by Faber-Castell! The first two were no stranger to me... but Faber Castel was! I had been hearing RAVES on their products and was dying to give them a try! This was my chance!! I tell you... I was not disappointed!
To begin I altered an old Prima flower tin! I had been saving this for just the right project, and this was it!
ALTERED TIN
These papers by Creative Imaginations seriously took my breath away!! I ADORE the colors in them... so different for Christmas, yet just so... right! Purple, green and silver!! They were perfect for my gift tin!

Here's how I created it!
  • Remove cover from tin.Cut 2 strips of silver paper same width as tin base. Run paper thru 5" Creative Station and adhere to tin base. Trim second piece to completely cover perimeter of tin. Add Creative Imaginations silver gems as desired to the Demask pattern.
  • Cut 2 strips of purple musical paper same width as tin cover. Run thru 1.5" Create-a-Sticker and adhere to tin as in first step. Using white Faber Castel Gelato's, rub around edges of the cover paper, smudge to create a snowy look. Also rub white Gelato's over the top portion of the tin. Smudge. This gives a snowy look to the cover rather than the shiny silver color.
  • Using Spellbinders Poinsettia die templates, cut/emboss one of each of the layers using the purple musical paper. While still in the die template, stencil thru the openings using the white Gelato's. Remove from template and smudge. Then add gelato's to the edges as well... continuing with the snowy look. Shape the petals of the Poinsettia by curling around a pencil. Adhere layers together using a hot glue gun.
  • Lightly wet a cotton swab and rub into Pearl Lilac Twinkling H20. Apply to leaves of Poinsettia to create a gorgeous shimmer!
  • Choose a die cut from the Creative Imaginations Winter Song die cut shapes. Run thru 5" Creative Station. Adhere to top of tin.
  • Cut strip of ribbon and wrap around tin, adhering on bottom.
  • Using leaves/berries die cuts from Creative Imaginations Winter Song die cut shapes, add purple pearls over top of berries, from Winter Song gem pack. Adhere to tin using Xyron Mega Runner. Add Zva crystal flourish. I cut it apart to create shape that wold work with my project.
  • Adhere Poinsettia to top. Add 2 silver gems to flower center.

This tin is a beautiful way to send a gift! How about creating some quick tags using the gorgeous die cuts in the Creative Imaginations Winter Song die cut shapes set?
Supplies:
Creative Imaginations Christine Adolph  Patterned papers(Songbird, Joyful foil) Winter Song  Gem Pack, Die Cut Shapes
Creative Imaginations Luminart Twinkling H20's (Pearl Lilac)
Faber Castell White Gelato
Xyron 5" Creative Station, Mega Runner
Spellbinders Grand Calibur Die Cutting Machine
Spellbinders die templates (Poinsetta)
Zva Creative Crystal flourish
May Arts Ribbon
Hot Glue Gun

For my second project... using this SAME collection (I couldn't resist!), I created a quick but beautiful pinwheel topped gift box! Perfect for a small gift...
PINWHEEL TOPPED GIFT BOX

The envelope was created using Spellbinders Hexagon Pinwheel Top Box (LF-008). It's not hard! Here's what I did...
  • Cut/emboss box using Creative Imaginations green leafy paper. Before removing from template, trace inside template using brown Faber Castell PITT Pastel pencil (1122-176). Remove from template and smudge lines. These lines emphasize the embossed areas of the box. Now use the PITT Artist Big Brush pen in Leaf Green (112) to outline. Fold petals in on embossed lines. Unfold.
  • Cut/emboss decorative inserts for the box using the purple musical paper. Outline in white Gelato and smudge. Run thru Xyron 1.5" Create-a-Sticker. Adhere to box. Refold petals in, tucking each one under the previous to create the pinwheel look. Add a silver gem to each petal from Creative Imaginations Christine Adolph Winter Song gem pack.
  • Cut/emboss large bloom from Spellbinders Bitty Blossoms using purple musical paper. Roll flower, shape leaves, adhere using hot glue gun. Add white gelato's to petal edges heavily. Do not smudge. Add silver Gem to center.
  • Adhere 2 large leaf/berry die cut shapes just under petals of box. Adhere blossom to center using Hot Glue gun. (Be careful not to adhere blossom to ALL of the box petals, or it will not open. Adhere to one or 2 of the petals.)
Supplies:
Creative Imaginations Christine Adolph Winter Song Patterned papers, Gem Pack, Die Cut Shapes
Faber Castell PITT artist pen Big Brush, leaf green, White Gelato's, brown PITT Pastel pencil
Xyron 1.5" Create-a-Sticker
Spellbinders Grand Calibur Machine
Spellbinders die templates (LF-008 Hexagon Pinwheel Top Box, S5-086 Bitty Blossoms)


For my third and final project for today, I have created a candle centerpiece! I LOVE candles and they are so much fun to alter! This would be such a beautiful gift to give a special friend! Check it out!
ANGEL CANDLE CENTERPIECE
To begin this project, I altered a wooden disk as a base. Here's what I did...
  • Using Faber Castell Gelato's in blue and white, color the top of the wooden disk in a scribble pattern. Alternate colors, overlapping. Once the top and sides are colored, wet a cotton pad and blend the colors to create even coverage. Do not blend colors completely, as the slight difference looks great! Add more white or blue as needed, continuing to blend.
  • Apply a layer of liquid Decoupage to the top and sides. While wet, sprinkle completely with ClearSnap fine glitter!! Allow to dry completely. Spray generously with a strong hold hair spray to set the glitter. (Yes, I said hair spray! )
  • Run ribbon thru 1.5" Create-a-sticker and adhere around perimeter of disk.

Now you can decorate the candle as desired! I used some more of the gorgeous papers from Creative Imaginations, as well as some die cut shapes! I smudged the edges of the paper using the brown PITT pastel pencil to give an aged look. I diecut a beautiful floral oval using Spellbinders Floral Oval dies. I used the brown pastel pencil again on this. I traced the inside of the die template and slightly colored to create a thicker border. I then blended it using a wet cotton pad. LOVE the aged look it gave to the snowflake embossed paper! The beautiful angel was the finishing touch, along with a couple of diecut flowers from Spellbinders Bitty Blossoms set. I colored the edges of the flowers with the pastel pencil as well to continue with the aged look. Love it!
I was thrilled to see that after running my paper thru my Xyron 5" Creative Station, it adhered great to the candel!! I was impressed! :)

Supplies:
Xyron 5" Creative Station, 1.5" Create-a-sticker
Spellbinders Grand Calibur Machine, Floral Ovals, Bitty Blossoms
Wright and Co ribbon
Beacon Decoupage
ClearSnap fine glitter
Hairspray
Candle
Wooden disk
Hot glue gun


Thank you SO much to Creative Imaginations and Faber Castell for the opportunity to participate in this amazing event!! And of course to Xyron for being so darn fabulous!! :) I hope that you have been inspired! Be sure to drop by all of the team blogs to see the incredible creations from the last 2 weeks!! Until next time... Happy Creating!  


Wednesday, October 10, 2012

Teresa Collins and Xyron

Hey there! Thanks so much for stopping by today! I am so excited to share todays projects with you! I had the fabulous opportunity as part of the Xyron Design Team to partner up with Teresa Collins! SQUEEL!! I absolutely ADORE  TC products! The collection I got to play with is the Tell Your Story collection, and it is absolutely GORGEOUS!! I could have created for weeks with this kit! The colors are stunning, and not my usual colors, so it was nice to play with!! Well, I use teal a LOT, but not in combination with a peach/coral color.
Anyway, enough talking... time to show you what I created!! :)

Love You Card and Gift Box
This I think is my favorite that I created. I ADORE the frame! It was part of the Teresa Collins paper! I fussy cut around it and adhered it to my card with a bit of foam to five it dimension!! Then I created a gift box to go with it using Spellbinders Square Bracket Box die set!!


Supplies:
Teresa Collins: Tell Your Story collection
Xyron 5" Creative Station, Mega Runner
Zva Crystal flourishes
Xacto corner rounder
Ranger distress ink (Frayed Burlap)
Hot Glue Gun
Wooden Skewers

A Moment In Time
This simple card kind of came about by accident! :) I had my stripes lined up to adhere across, when they went all askew on me... I kind of liked it!! So I played around a bit more and this is what I ended up with! A happy accident! :)
I love depth to my cards, and this one is no exception. Although the basic shape is rectangle, I still popped them using foam for that extra definition.
Supplies:
Teresa Collins: Tell Your Story collection
Xyron: Mega Runner, 5" Creative Station
Buttons Gallore and More: Button
Pink Paislee: Twine
Ranger distress ink: (Frayed Burlap_
Foam squares

The Meaning Of Life
I just could not go without creating a scrapbook page with this kit. There are so many beautiful patterns! And the cardstock stickers amke creating SO easy!!

In creating this page, I used some chipboard frames (I can NOT remember the manufacturer of these... possibly Creative Imaginations???) One I left plain and inked lightly. The other I covered with newspaper print paper from Teresa's kit. I applied Xyron Mega runner adhesive to the chipboard and stuck the paper to it! Then I cut out using a craft knife! So easy! And I love the look!!

Supplies:
Teresa Collins Tell Your Story collection and cardstock stickers
Xyron Mega Runner, 5" Creative Station
Zva Creative Crystal flourishes
Ranger distress ink
Foam
Wooden skewers

Make sure you stop by the Xyron blog as well as Teresa Collins' Design team blog for your chance to win this GORGEOUS collection and more! And don't forget about the Xyron blog as well!!

Thanks for stopping by!
Until Next Time...
Happy Creating!


Thursday, September 27, 2012

Jewel Keys Wedding Card... sneek peep

Good morning my friends!! Thanks so much for stopping by!!
Today I have a post up on Julianna Hudgin's Design Team blog! I'd love for you to stop by!!
Here is the project that I'm sharing over there... Well... a peek of it anyway~ You''ll have to stop by the blog
to see more!! :)

Hope you'll stop by to see the entire project and for a cool KEY tutorial!!
Thanks for stopping by!
Until Next Time...
Happy Creating!

Saturday, September 22, 2012

Creating with Zva Creative

Good morning!!!
It's me again... honest!! I know... BLOWN AWAY, right? So many posts in one month!! And all in a matter of a week! LOL! Like I mentioned... I was having some big issues and now that those are resolved and Blogger let's me IN... I have SO much to share with you all!! :)

I had the privilege of playing with some FANTABULOLUS Zva Creative goodies recently!! My good friend, X-Roomie (Spellbinders Retreat, '11), and fellow designer ,( who JUST happens to be the DT Coordinator for Zva Creative) had some yummies sent my way! Thank you Windy Robinson!! SQUEEEE!!! I'll admit, they arrived at the beginning of the summer... I've been adding them to projects here and there. LOVE THEM!!....
      **LOVE LOVE LOVE**
If I had my way, I'd have flowers and blingy bling on everything I create! LOL! but, being Mom to 1 girl and 4 BOYS... I can't create EVERYTHING this way!! :)
So today's post is to share with you what I created using just a bit of the Zva Creative goodies sent my way. There is still a LOT of stuff waiting to be used... and I will be sure to share with you as I create. A BIG HUGE THANK YOU to Windy, Carolyn and Zva Creative for the goodies! You sure made this gal happy! :)
2 of these projects I have already shown on my blog, as they were created for other things. But I am going to share them again here, with the focus now being on the Zva.
ON YOUR SPECIAL DAY
These 2 cards are brand new... never seen before... EXCEPT for the beautiful graduates that I gave them to! :) I created these to give to my niece and friend for their High school graduation. Let me show you some close-ups!
Both of these cards were created with the same design and supplies. I changed the focal shape using my Spellbinders Die templates from Floral Ovals in this one, to the Splendid Circles in the second. I also used a different color to accent... here's it's the green Zva crystals and green blooms.

The second card is the same but uses black pearls from Zva, and orange blooms.
Details...
I think black pearls make my absolute favorite flourishes!!! They go with EVERYTHING and are always the perfect touch!! Just like in this scrapbook page that I created and shared previously.
ADAM AND LEAH
And a closeup of the pearls.... I just love that they can be cut apart as well and used to create whatever design you like!! I often split a flourish... call me stingy! LOL!

And my final project is from yesterday's post... I created this adorable little gift envelope using more gorgeous Zva crystals as the finishing touch!!
FOR YOU GIFT ENVELOPE
These little flourishes are an example of cutting them apart. This small package holds 2 small flourishes. I cut each in half and made my own arrangement, to fit my project!
So there you have it... just a small sample of what Zva Creative products can do for your projects!!
Again, special thanks for Zva and their team for the goodies!!! :)
Supplies:
Card Duo:
Zva Creative: Crystal and Pearl flourishes
Xyron: 5" Creative Station, 1.5" Create-a-sticker
Spellbinders: Grand Calibur, die templates (S4-354 Splendid Circles, S4-456 Floral Ovals, S4-114Standard Circles LG, S4-110 Standard Ovals LG, EL-020 Awesome Blossoms M-Bossabilities)
GCD: Patterned Papers (Paris Nights)
Worldwin: Cardstock (black, white)
ClearSnap: Cat Eyes fluid chalk
Penny Black: Gratitude stamps
KaiserCraft: Lace
Adam and Leah:
For You Gift Envelope:
Thanks for stopping by!!!
Until next time...
Happy Creating!!

Friday, September 21, 2012

Xyron and ClearSnap : Day 4

Hey there!!
Welcome to day 4 of the Xyron and ClearSnap partnership!! This has been SO much fun!! If you have not been following along, stop by the Xyron blog to find out the details!!
Today I have 4 projects to share with you... I had SO many more fabulous and fun ideas, but time ran out... kids needed meals... laundry needed doing... you know how it goes! :)

For my first project, I want to show you my absolute favorite. I can't take credit for the idea... as I seen it done on Kazan Clark's blog the other day. When I seen it, I had this lightbulb moment... "I HAVE to do that for the blog swap!!!" I thought!! So, right after breakfast, I got at it... it was done in 1/2 hour. Seriously... it's SO quick!! Check it out...
Chevron Stamped Candle
It totally looks like the stamping is directly on the candle, but it is not! :) Here's the basic how-to. For more details, stop by Kazan's blog and see her fabulous tutorial.
1. Stamp background stamp onto tissue paper. Trim to height of candle. Lightly tack in place with Mega runner. Repeat with using as many piece as needed to cover candle.
2. Heat with heat gun. This will melt the wax beneath the tissue paper. The paper will stick to the candle and disappear. It's really quite cool to watch! :)
Then decorate as desired!! I adhered 2 strips of thin white lace using my Xyron 1.5" Create-a-sticker. Then diecut some gold foil paper with my Spellbinders Foliage dies. Add a spray of flower centers and a premade flower and you're finished!! I usually make my own flowers with Spellbinders dies, but I wanted this to be fast... and it was!!

Supplies:
Red Candle
Xyron: Mega Runner, 1.5" Create-a-sticker
Clear Snap: Wicked black Archival die ink
Red tissue paper
Unity Stamp Co: Chevron Stamp
Spellbinders: Foliage dies and foil
Wright and Co: lace
Prima: flower
Hot Glue Gun

FOR YOU Gift Envelope
This little gift envelope was created using Spellbinders die template, LF-007 Hexagon Petal Envelope. Here are a few of the details...
*Cut/emboss envelope using ivory paper and Spellbinders Grand Calibur machine.
*While still in template, spritz with ClearSnap Smooch Spritz in purple (Not sure of exact color name). To keep spray light, hold far away from paper. For a heavier and deeper color, spray closer. Let dry, remove template. I lightly inked the edges using distress ink at this point.
*Apply a light touch from the Mega runner to the tip of each "petal" of the envelope and fold in, tucking one under the other.
*Next I created 3 blossoms using Spellbinders Bitty Blossoms collection. While they are still in the die tempate, I dabbed a sponge into some of the Smooch Spritz and stenceled thru the template. Remove and roll flowers. I lightly added a touch of the purple to the edges of the flower petals. I cut a leaf as well and stenceled using Fluid chalk in OLIVE. Adhere to box using hot glue. Add Zva jewel flourish and a small tag. (NOTE: I even stamped using the spritz!!)

Again! Very simple and quick!!
Supplies:
Xyron Mega Runner
ClearSnap: Smootch Spritz, Cat Eyes chalk ink (Olive)
WorldWin: Ivory cardstock
Spellbinders: Grand Calibur, Die Templates (Hexagon Petal Envelope, Bitty Blossoms)
Zva flourish
Flourishes stamp

Two more quick projects to share... I'll be fast... I promise! :)
Gather Together Card

Supplies:
ClearSnap: Colorbox Archival Ink (Grasshopper)
Xyron: 5" Creative Station, Mega Runner
Spellbinders: Grand Calibur, Die Templates (ORchard Harvest Tags and Accents, Standard circles SM)
Bo Bunny: Country Garden 6x6 paper pad
Creative Impressions: Twine
Elmers: X-acto corner rounder, Gel pens
Buttons Gallore and More: Button
Unity Stamp Co: Orchard Harvest tags and accents stamps

You Are Simply Amazing


This final card has a fun technique I want to share with you quickly... I used a Spellbinders M-Bossabilities template. If you are not familiar with these, they are double sided embossing folders! Double the fun!! Anywho... I rubbed ink directly onto the embossing folder... in   a bit of a rainbow pattern... I know it's faint in the photo... as I used pastel colors to keep it soft.  If you look close, you will see the change in colors. Once I have the ink applied, I inserted the paper and closed the embossing folder. Using the Grand Calibur machine and rasberry embossing plate, I embossed the paper. When it comes out, it has a beautiful embossed rainbow. Very cool!! Then I added small dots of smooch.

Suppiles:
Xyron Mega Runner, 5" Creative Station
ClearSnap: Fluid Chalk (Baby's breath collection) Daffodile and Blue Iris (For tag), Smooch (Cape Cod)
Recollections: White Card Stock, flowers
Bazill: Blue cardstock
Spellbinders: Grand Calibur, Rasberry plate, EL-006 Mystic
Creative Impressions: Twine
Just Rite Stampers: Sentiment


Are You Still With ME??
LOL!
That was a long post! Thanks for sticking around! :)
Thanks to CLEARSNAP for this fabulous partnership!! It has been a blast!! Drop by their blog and facebook page to see more inspiration!!
Until Next Time...
Happy Creating!!


Thursday, September 20, 2012

Canvas and Burlap Thanksgiving Table Set

Canvas and Burlap Table Set


This cute little table set was created for Spellbinders using some of their fabulous dies! The dies paired up with a little bit of canvas and burlap... SCREAM Fall to me!! I think fall is my favorite season to create things for! I love Christmas of course, but the beautiful rich colors of Fall are my fav!!

This project can be found on the Spellbinders website  in my gallery. It was also featured in their homepage slide show for a while! 

Spellbinders Supplies:

S4-116 Standard Circles SM
S4-345 Picot Edge Circles
•S5-029 Nested Lacey Pennants
•S5-104 Bauble Blossoms Two
Spellbinders™ Grand Calibur® Die Cutting and Embossing Machine

Preferred Partner Products:
Gina K. Designs, Autumn Beauty Stamp

Cross Promotional Partner Products:
WorldWin Papers®, Ivory Cardstock
Canvas Corp LLC, Canvas, Burlap
Clearsnap, ColorBox Dark Green Fluid Chalk Ink
Buttons Galore And More, Buttons
Beacon Adhesives, Zip Dry Glue
Other Supplies:
Ranger Distress ink (Frayed Burlap)
Maya Road: Decorative Pins
Prima: Ivory Lace;
Ribbon; Quick Quotes
Glue Gun

Thanks for stopping by! Have fun decorating for Fall!! Stop by tomorrow for my turn to show you ClearSnap and Xyron paired together!! I have 4 projects to share with you!!! I could create for this non-stop... but my kids have to eat... LOL!
Until then...
Happy Creating!


Wednesday, September 19, 2012

Xyron and Cloud 9 rock the house!

Hey all!!
I have to begin my saying I think I JUST MIGHT have gotten the issue worked out with my blog!! Long story short... I was taking about 20 minutes to get logged into my account. It was all messed up... but I think I have it fixed... FINALLY!!
What does that mean? I just might blog more thank once or twice a month now!! :)

So to begin I want to share a few quick projects that I made for the Xyron and Cloud 9 Facebook album!
2 cards and a little treat container! Here we go!!

JUST A NOTE

Supplies:
Cloud 9 Specialty collection and fabric flowers/buttons
Xyron 5" Creative Station, Mega runner
Clear Snap: Black die ink
Flourishes: Sentiment Stamp
LOVE YOU

Supplies:
Cloud 9 Specialty collection and fabric flowers/buttons
Xyron 5" Creative Station, Mega runner
Bazzill Basics Paper®: Black and white cardstock
Clear Snap: Black die ink
Flourishes: Sentiment Stamp

FOR YOU Treat container

Supplies:
Cloud 9 specialty collection
Xyron mega runner
Bazzill Basics Paper®:White Cardstock
ClearSnap: Red pigment die ink
My Minds Eye: Red brad
Flourishes: Sentiment stamp
Spellbinders Grand Calibur Machine, Die templates (S5-028 Nested Pennants)

There are no fancy instructions for these projects! They are super simple and YOU can create them!! :)
To see what the rest of the Xyron team did with these fabulous products, check out the facebook album! And if you don't already "LIKE" Xyron's page... do that first! You'll be glad you did!

Thanks for stopping by!
Until Next time...
Happy Creating!