
Hello friends! It's been a long time since I've blogged... and this will be my last.
With mixed emotions I have decided that it's time to hang up the scissors... so to speak. My time creating has come to an end. At least in the public eye. There may come a day that I scrapbook again, but it will not be publicly like it has been.
I just feel drained, depleted. Nothing left to give. It's time to invest time into making the memories instead of just trying to preserve them! I'll still take tons of photos... probably more, as I'm not just looking for that one perfect shot for my page. I'll try to keep things documented so that the memories are not forgotten. Simplify.
I have loved so many things about creating in the paper craft industry!! I have had the honour of designing for some amazing companies!! I'll forever be grateful to those who gave me a chance and taught me so much!!! You know who you are...
I have put off this post for a while... wondering if maybe I'd get the urge again. But nope... every time I think "I should do a page" I get a sick feeling in my stomach.
So thank you to those who visited me here and were such an encouragement to me with your kind comments!!
Much love....
Tuesday, June 07, 2016


Wednesday, March 16, 2016
Bible Journaling: 1 Samuel 1
Hey all!! Hope all is well with you! Been a busy month here with March break. So I have a few bible journaling pages to share with you to update you on my progress with that!!
I had a bump in the road... my heat gin died!! GASP!! I know!! So there was a 2 week stretch where I could not create! It was tough, but I made it thru and have a nice pretty new one here now!
So, here we go... here are my latest creations!!
My page is created based on 1 Samuel 1. (I used the challenge from this website... it has monthly challenge prompts!! www.rebekahrjones.com/bible-art-journaling-challenge) It is the story of Hannah and how she wept before the Lord, praying for a child. In verse 19 we see that "the Lord Remembered her..."... this spoke to me... reminded me that no matter what we are going thru... no matter how small it may seem, if we bring to to the Lord, He will hear us...
I really enjoyed creating this page... I was trying to keep it more to the margin... but it spilled over... I guess that's just how I roll, can't color in the lines! LOL!

I really enjoyed creating this page... I was trying to keep it more to the margin... but it spilled over... I guess that's just how I roll, can't color in the lines! LOL! I loved this banner stamp from the Celebra'tions collection from Spellbinders. I stamped it with Jet Black Staz-on ink from Imagine Crafts/Tsukineko. I think I need to re-ink my inked, because it didn't stamp as crisp as I wanted. So I took my black pen and filled in some of the blotchy spots.
 Here is a peek at some of the products that I used in this project... I didn't show the stamps or stencils in here... sorry!! :(

And that's the page for today!! I have a couple more to share... but I'll pace myself... :) I have a video fro one that is waiting for me to get time to edit it... we shall see... :)
Thanks for stopping by! Until next time... Happy Creating!!
ps.. I have some fun creative news to share soon as well..... :)
I had a bump in the road... my heat gin died!! GASP!! I know!! So there was a 2 week stretch where I could not create! It was tough, but I made it thru and have a nice pretty new one here now!
So, here we go... here are my latest creations!!
My page is created based on 1 Samuel 1. (I used the challenge from this website... it has monthly challenge prompts!! www.rebekahrjones.com/bible-art-journaling-challenge) It is the story of Hannah and how she wept before the Lord, praying for a child. In verse 19 we see that "the Lord Remembered her..."... this spoke to me... reminded me that no matter what we are going thru... no matter how small it may seem, if we bring to to the Lord, He will hear us...
I really enjoyed creating this page... I was trying to keep it more to the margin... but it spilled over... I guess that's just how I roll, can't color in the lines! LOL!

I really enjoyed creating this page... I was trying to keep it more to the margin... but it spilled over... I guess that's just how I roll, can't color in the lines! LOL! I loved this banner stamp from the Celebra'tions collection from Spellbinders. I stamped it with Jet Black Staz-on ink from Imagine Crafts/Tsukineko. I think I need to re-ink my inked, because it didn't stamp as crisp as I wanted. So I took my black pen and filled in some of the blotchy spots.
Then I took this fun floral stamp (Dylusions) and stamped in the 3 colors of stickers that I was using... I used Staz on ink for that as well... these colors coordinated with the watercoloring I did next. I really like how the colors matched so well!! Score!! Then I added the alpha stickers inside of the banner... they fit pretty good, but I had to overlap some in the word Remember...
And lastly I added my journaling and a touch of stencilling. Oh, and a little gem to the centre of each flower! Which you probably can't notice in the photos...


And that's the page for today!! I have a couple more to share... but I'll pace myself... :) I have a video fro one that is waiting for me to get time to edit it... we shall see... :)
Thanks for stopping by! Until next time... Happy Creating!!
ps.. I have some fun creative news to share soon as well..... :)
Tuesday, February 09, 2016
Hello Love: Heart Silhouette background layout
Hello all! Beautiful snow day here!! Great day to share with you my latest layout!! Once again, I tried out a free cutting file for the Silhouette!! I knew it would be cute to use, but i fell in LOVE with this layout once I had completed it!! I'm sure the photos will not do it justice, but it's so full of dimension! I'll share with you how I created it!!

I'm not sure if you can tell by this photo, but each of the hearts are on the page using foam squares! This gave it so much dimension!! The image below shows you that a little better!!

Here's what I did to create this page....
- Cut Heart Background from 12x12 white card stock. Remove from Silhouette cutting plate and adhere to background patterned paper. (My Minds Eye: Fancy That). Machine stitch edge.
- Cut Heart Background again, this time onto My Minds Eye: On Trend Ombre paper.
- Gently remove hearts from Ombre paper in order, and adhere to white background in the same order that you remove them. This will keep the ombre design perfect!! I used Scrapbook Adhesives by 3L Large Foam squares, white for this. One square per heart!
- Lightly sand edges of 3x4 photo and matt with white card stock. Add a black matt, slightly smaller, and offset. Layer using 2 Jillybean Soup White frames, each offset. Add black and white washi tape to a strip of white yardstick. Slide in under photo to the right.
- Die cut title in Silhouette using Dancer Script from black card stock.
- And really, the embellishing is up to you! I added the LOVE sticker to a chipboard arrow (My Minds Eye: On Trend). I printed my journaling in a script font to match my title, cut into strips and added that. I finished off with some added embellishments (see list below).
This page was not at all complicated! it was a little bit time consuming, replacing the hearts, but other than that, it came together in a flash.

Did I mention that I'm LOVING, loving LOVING! my Silhouette??? If not... I LOVE MY SILHOUETTE!!! ;)
Supplies:
Background Cut File: Birds Cards Heart Background FREE Download!!
Font: Dancer Script
Patterned Paper: My Minds Eye: On Trend, Fancy That (see exact links above)
Card Stock: Spellbinders Whirl White, Worldwin Papers:Black
White Frames: Jillybean Soup
Embellishments: Freckled Fawn: Cork Hearts; Simple Stories clear stickers; MME Enamel Dots; MME Chipboard; Crete Paper puffy stickers; Metal clip (unknown), Washi Tape from Blitzy
Adhesive: Scrapbook Adhesives by 3L: White Large foam Squares, Adhesive Runner
So that's it for today! Loving all these heart pages! Hope to have at least one more before the weekend!! Time will tell. if not, it's ok to do heart pages after Valentines, don't ya think??
So, until next time, Happy Creating!!
Friday, February 05, 2016
My Love: First try with the Silhouette Cameo!
OMW!!! I am so excited!!! I took the plunge and bought a Silhouette Cameo digital die cutting machine!!! I have been considering this for over a year, and now the time was right!!! I had Christmas $ sitting there, and wondered what to spend it on... Well, it's all spent now!! :)
So, I took it home, installed it and within 10 minutes I had die cut my first title!! It was SOOO easy to use!! Second time, I downloaded a free font, installed it and die cut another title!! I a in love!! I have tons of files saved on my new pinterest board... and the ideas are coming fast and furious!!! If only I had the time.... It was easier to make time to create when I was getting paid for it... LOL! Now it's harder to justify the time I want to spend creating! :) Oh well... I'm totally enjoying this time of free creativity!!
So, on to today's project!!

I downloaded a free cutting file from Scrapbook and Cards Today... they have a monthly cut file designed by Nicole Nowosad of Just Nick designs. I actually downloaded all of their free files from the last 2 years... if I'm being honest! LOL!!! The Feb 2016 file is adorable!! It's a fun hearts background piece!

Isn't it adorable?? I backed each of the hearts with patterned paper and mounted the entire piece with foam tape to give a bit of depth. Love the effect!

The title was created using the "Dancing Script" which I downloaded for free online! Found it on pinterest! Then i created an "offset" piece, which worked as a shadow/frame for it! Love it! So easy!!So now, needless to say, I'll be using lots of fun cut files and fonts in the future! I'll link to them all when I can!
Supplies:
Cut File: Scrapbook and Cards Today Feb 2016 file, Dancing Script font
Patterned Paper: Jen Hadfield for Pebbles Cottage Living collection: 6x6 paper pad and 12x12 Hardwood
Card Stock: Whirl White by Spellbinders, Black by Worldwin Papers
irRESISTables texture spray: Wedding Dress White
Embellishments: Crate Paper Puffy stickers, Amy Tangerine Remark Alpha stickers, Freckled Fawn Cork Hearts, Washi Tape from Blitzy, and a few other odds and ends
Thanks for stopping by today! Until next time... Happy Creating!
So, I took it home, installed it and within 10 minutes I had die cut my first title!! It was SOOO easy to use!! Second time, I downloaded a free font, installed it and die cut another title!! I a in love!! I have tons of files saved on my new pinterest board... and the ideas are coming fast and furious!!! If only I had the time.... It was easier to make time to create when I was getting paid for it... LOL! Now it's harder to justify the time I want to spend creating! :) Oh well... I'm totally enjoying this time of free creativity!!
So, on to today's project!!

I downloaded a free cutting file from Scrapbook and Cards Today... they have a monthly cut file designed by Nicole Nowosad of Just Nick designs. I actually downloaded all of their free files from the last 2 years... if I'm being honest! LOL!!! The Feb 2016 file is adorable!! It's a fun hearts background piece!

Isn't it adorable?? I backed each of the hearts with patterned paper and mounted the entire piece with foam tape to give a bit of depth. Love the effect!

The title was created using the "Dancing Script" which I downloaded for free online! Found it on pinterest! Then i created an "offset" piece, which worked as a shadow/frame for it! Love it! So easy!!So now, needless to say, I'll be using lots of fun cut files and fonts in the future! I'll link to them all when I can!
Supplies:
Cut File: Scrapbook and Cards Today Feb 2016 file, Dancing Script font
Patterned Paper: Jen Hadfield for Pebbles Cottage Living collection: 6x6 paper pad and 12x12 Hardwood
Card Stock: Whirl White by Spellbinders, Black by Worldwin Papers
irRESISTables texture spray: Wedding Dress White
Embellishments: Crate Paper Puffy stickers, Amy Tangerine Remark Alpha stickers, Freckled Fawn Cork Hearts, Washi Tape from Blitzy, and a few other odds and ends
Thanks for stopping by today! Until next time... Happy Creating!
Wednesday, February 03, 2016
Be Awesome: Keeping it simple
Hello all! What a week last week was! Wow!! On the road every single day! I don't do well with that... Home life is too busy to be on the road each day! That being said, I have been getting some creating done, but not getting to share it! So I'm here today to share a layout that I created with you. Just for me. YEAH!!!
This page was designed with white space in mind. The focus was the photo. A small black and white photo of my daughter before her dance competition a couple of years ago.

To accent the photo, I first added some watercolour paint behind where the image would go. I used some green, teal and purple. The color inspiration came from the floral die cut! Worked perfectly! And while the diet had gold tracing the design, I decided to pull that into my design as well... in the title as well as in the chipboard frame.

To accent the photo, I layered up a chipboard frame and some wash tape along with a few simple embellishments. Nothing fancy or overdone... really really simple. But yet i absolutely love the effect. And of course a nice swirly title finishes it off perfectly! :)
Thanks for stopping by! I have a process video in the works for a Bible journaling page... again, being on the road so much takes away my video editing time. ;) So stay tuned for that to come hopefully later this week!!
Here's the supply list for today's project!
Supplies:
Card Stock: Spellbinders Whirl White yardstick
Watercolour Paints: Artists Loft (Michaels)
Wash Tape: Blitzy
Title: Jen Hadfield for Pebbles Puffy Phrase Stickers
Embellishments: Fancy Pants chalkboard tags, MME Metal clip, Dear Lizzy Diecut flower: Crate Paper Citrus Bliss Sticker, and frame
Thanks again for stopping by!
Until next time... Happy Creating!
This page was designed with white space in mind. The focus was the photo. A small black and white photo of my daughter before her dance competition a couple of years ago.

To accent the photo, I first added some watercolour paint behind where the image would go. I used some green, teal and purple. The color inspiration came from the floral die cut! Worked perfectly! And while the diet had gold tracing the design, I decided to pull that into my design as well... in the title as well as in the chipboard frame.

To accent the photo, I layered up a chipboard frame and some wash tape along with a few simple embellishments. Nothing fancy or overdone... really really simple. But yet i absolutely love the effect. And of course a nice swirly title finishes it off perfectly! :)
Thanks for stopping by! I have a process video in the works for a Bible journaling page... again, being on the road so much takes away my video editing time. ;) So stay tuned for that to come hopefully later this week!!
Here's the supply list for today's project!
Supplies:
Card Stock: Spellbinders Whirl White yardstick
Watercolour Paints: Artists Loft (Michaels)
Wash Tape: Blitzy
Title: Jen Hadfield for Pebbles Puffy Phrase Stickers
Embellishments: Fancy Pants chalkboard tags, MME Metal clip, Dear Lizzy Diecut flower: Crate Paper Citrus Bliss Sticker, and frame
Thanks again for stopping by!
Until next time... Happy Creating!
Thursday, January 21, 2016
Intro to my Bible Journal
I accepted Jesus Christ to be my personal Saviour at the age of 5 after coming to the realization that I was a sinner in need of a Saviour. There was nothing that I could do that was pleasing in the sight of a Holy and Almighty God, other than accept the free gift of salvation He was offering, thru the Sacrifice of His Son. That was 24 years ago! So to say that my faith is a huge part of my life is putting it mildly.
You already know that I am a creative person... ;) So how exciting to be able to combine my Love of my Saviour with my love for all things creative, into this fabulous new art form, called Bible Journaling!!
I in no way claim to be a pro at this... I am a complete newby!! I had begin planning on keeping it completely private. Not sharing my pages with you. To keep it real, raw and personal. Since then, I have decided to still keep it real, raw and personal... but to share it with you. I want you to know me... to understand who my Saviour is and what He means to me. My prayer is that thru these pages you will see a clearer picture of who God is...Who he is to me. And why I love him so.
So... here we go. A glimpse into my Bible Journal.
How to begin...
* Purchase a Journaling Bible... These can be bought at almost any book store now. I bought mine from Christian Books.com. Here is the link to all that they have available... And here is the exact one I purchased. I love it!! Here's what it looks like... with a few little stickers added to the front...

* Get a good set of black pens. I am using Faber Castel PIIT Artist pens, but there are lots of varieties out there. Anything that will not bleed thru your pages is great! If you already mark your bible then I'm sure you have something!!
*Grab some kind of colouring medium. There a million options out there... from simple coloured pencils to acrylic paints and mediums! Decide which route you wanna take! To begin, grab some coloured pencils and pens. This way you will not need to gesso your pages to protect them. You can just draw and color in your margins and keep it clean and simple.
I can not draw to save my life... and my penmanship leaves much to be desired... looks like I'm in first grade. ;) So I am not into drawing in my bible. I prefer other things... I'll get to that...
*If you DO decide to add more... first thing to purchase is a clear Gesso or Matt Gel Medium.
DO NOT purchase Liquitex Clear Gesso...unless you like your pages to feel like sand paper. Not cool at all!!! I did purchase the Golden Matte Medium and it's much better... take my word for it. :)
*From here you can add all sorts of fun stuff! Paints, stamps, inks, etc.
That's all I'm going to say for today. I don't want to overwhelm you completely!! I'm going to be doing a video series for you outlining some different mediums, techniques, and ideas for your bible journal!! I hope you'll join me! If you are not already following my You Tube Channel, go do it now!
To introduce you to my bible journal and give you brief overview I have created a little video for you! Looking forward to all the fun we will have together!! I'd love to hear your thoughts and any questions or ideas you have!! Here we go!!
Now remember... this is my journal... my penmanship is horribly messy... but it's mine... forgive me... LOL!
And here's a shot of each of the pages I have shared in the video...


Until next time... Happy Creating!
You already know that I am a creative person... ;) So how exciting to be able to combine my Love of my Saviour with my love for all things creative, into this fabulous new art form, called Bible Journaling!!
I in no way claim to be a pro at this... I am a complete newby!! I had begin planning on keeping it completely private. Not sharing my pages with you. To keep it real, raw and personal. Since then, I have decided to still keep it real, raw and personal... but to share it with you. I want you to know me... to understand who my Saviour is and what He means to me. My prayer is that thru these pages you will see a clearer picture of who God is...Who he is to me. And why I love him so.
So... here we go. A glimpse into my Bible Journal.
How to begin...
* Purchase a Journaling Bible... These can be bought at almost any book store now. I bought mine from Christian Books.com. Here is the link to all that they have available... And here is the exact one I purchased. I love it!! Here's what it looks like... with a few little stickers added to the front...

Now, if you'd like to give it a try without purchasing a new bible, try it in your bible you use every day! Keep it simple... using just coloured pencils/pens and see what you think!
* Get a good set of black pens. I am using Faber Castel PIIT Artist pens, but there are lots of varieties out there. Anything that will not bleed thru your pages is great! If you already mark your bible then I'm sure you have something!!
*Grab some kind of colouring medium. There a million options out there... from simple coloured pencils to acrylic paints and mediums! Decide which route you wanna take! To begin, grab some coloured pencils and pens. This way you will not need to gesso your pages to protect them. You can just draw and color in your margins and keep it clean and simple.
I can not draw to save my life... and my penmanship leaves much to be desired... looks like I'm in first grade. ;) So I am not into drawing in my bible. I prefer other things... I'll get to that...
*If you DO decide to add more... first thing to purchase is a clear Gesso or Matt Gel Medium.
DO NOT purchase Liquitex Clear Gesso...unless you like your pages to feel like sand paper. Not cool at all!!! I did purchase the Golden Matte Medium and it's much better... take my word for it. :)
*From here you can add all sorts of fun stuff! Paints, stamps, inks, etc.
That's all I'm going to say for today. I don't want to overwhelm you completely!! I'm going to be doing a video series for you outlining some different mediums, techniques, and ideas for your bible journal!! I hope you'll join me! If you are not already following my You Tube Channel, go do it now!
To introduce you to my bible journal and give you brief overview I have created a little video for you! Looking forward to all the fun we will have together!! I'd love to hear your thoughts and any questions or ideas you have!! Here we go!!
Now remember... this is my journal... my penmanship is horribly messy... but it's mine... forgive me... LOL!
And here's a shot of each of the pages I have shared in the video...


Until next time... Happy Creating!
Monday, January 11, 2016
Enjoy the Journey
Hello friends!!
Here I am again to share another scrapbook page! 2 in a row! I'm loving it!!
I did day I was going to share my Bible Journaling... and I will... I just have to get my gesso issue worked out first. :)
So, today I'm sharing a second layout! I am so enjoying the watercoloring for a background!! I think I'm hooked!! I just want to sit and create backgrounds!! LOL! Let me show you what I created...

 I don't usually scrapbook the same child twice in a row, but i did this time... :) Just happened to be the photo's that worked!!
I also wanted to add something to bring it all together... so I traced a large circle twice... and that did the trick, for me! Of course, I'm really a circle lover. :)
Well, just a quick post for today! Thanks for stopping by!!
Until next time, Happy Creating!!
Here I am again to share another scrapbook page! 2 in a row! I'm loving it!!
I did day I was going to share my Bible Journaling... and I will... I just have to get my gesso issue worked out first. :)
So, today I'm sharing a second layout! I am so enjoying the watercoloring for a background!! I think I'm hooked!! I just want to sit and create backgrounds!! LOL! Let me show you what I created...

To create the background, I did a lot of splatters using my watercolour paints... as well as adding a bit of colour using Gelato's. A bit of stencilling with some Memento ink... really very simple to do, but not always simple to make look right. I kept adding and adding until I felt it had the right balance with the papers and embellies.

I also wanted to add something to bring it all together... so I traced a large circle twice... and that did the trick, for me! Of course, I'm really a circle lover. :)
Well, just a quick post for today! Thanks for stopping by!!
Until next time, Happy Creating!!
Friday, January 08, 2016
Summer Adventure
So here we are... a new year has begun, and I already see progress!! I have created my first scrapbook page in months!! There was no assignment, no deadline, and no specifications! Just pure freedom!!! And I had SO much fun!!!

I played with some Gelato's to create the watercolour look! I think this is a technique I'll be using a lot! I absolutely love the look of it! Maybe I'll get a little video tutorial up for ya's to see how i did it! :)

It's going to take me some time to develop my style again. There are so many things i want to try, products and techniques!! So exciting!!

Supplies:
Card Stock: Spellbinders-Whirl White
Patterned Paper: Pink Paislee: Atlas;Altitude, Latitude, Elle's Studio: Meal Planner; Let's Eat
Ink/Colors: Faber Castel Gelato's: Double Scoop Snow Cone, "Shimmer teal, yellow" (not proper names... not on the tubes, sorry!), PITT Artists Pens black, Deco Art Mister: Carbon Black
Embellishments, stickers: Crate Paper: Pool Side: layered embellies, , Decorative Frames, American Crafts Thickers Sun Kissed, Amy Tangerine Remarks alpha stickers
Adhesive: Scrapbook Adhesives by 3L: Foam tape, permanent adhesive runner
Dies: Spellbinders "Fun filled Rings"
Other: Washi Tape, Twine
Tune in next time for a little peek into my bible journaling. I'm a newbie to this so I still have a lot to learn, but thought I'd share a little peek! :)
Thanks so much for stopping by!
Until next time... Happy Creating!!
Sunday, January 03, 2016
Reflecting on 2015... some highlights!
Looking back on 2015... it was a fantastic year in so many ways! I had some wonderful creative opportunities...
*Working for Scrap-N-Art online magazine!
*Designing for DCWV
*Continuing on with Imagine Crafts
*Another term with Spellbinders
*Design team trip to Phoenix AZ with my Spellbinders peeps!
*Some awesome publications, including a couple of covers!!
It was also a year of change creatively for me. I stepped down from all of my design team commitments except for Spellbinders. I was burnt out. Never thought that would happen... but it did. I really needed a break! So beginning in June, I created only for Spellbinders.
Now, my work for Spellbinders ended with 2015. I will miss it SOO much! I adore Spellbinders products and will be forever thankful for the amazing opportunity to design for Stacey Caron!! She is so special to me! She gave me the opportunity of a lifetime... She made us feel like we were family... Getting to hang out with the design team in Phoenix was so special. We got to know everyone on a personal level. That is what made this company unique. Spellbinders is what it is because of you Stacey...
I wasn't sure what would happen once I was finished with all of my commitments. I was afraid I would loose my desire to create. Didn't know if perhaps it would be the beginning of the end for me...
But i am so happy to say that it's not!! I have been working on organizing my studio, and I'm SO excited about this new freedom I have!! I can create WHATEVER I want, using WHATEVER I want... WHENEVER I want!! It's a very strange feeling... but very liberating! !I look forward to getting back to my roots... to scrapbooking! i enjoy the paper crafts, DIY and cards, but Scrapbooking is my passion!!
Now, that doesn't mean I will not be applying to some awesome teams... I still ADORE working for companies... just sayin'... Hoping for some AMAZING opportunities to come my way in 2016!!
I'd like to share some of my 15 favourite projects from 2015... In no particular order...


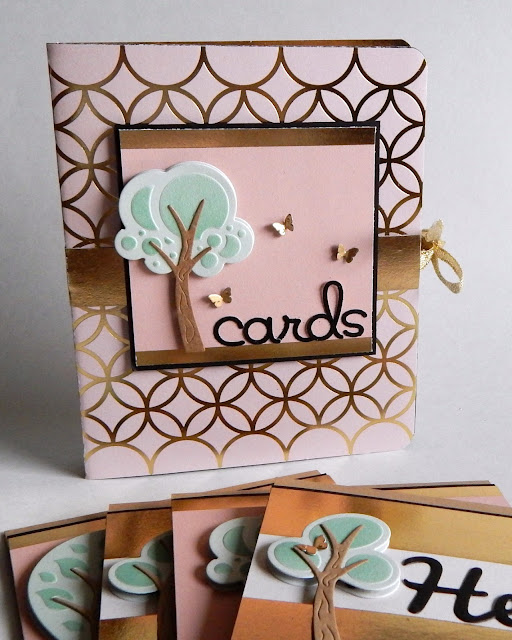


Wow! That was so hard to decide! So much variety! so much fun!! There are a few others that I'd like to add, but they are using new product by Spellbinders, so I can't share yet! ;)
Thanks for joining me on this look back thru 2015!! I'd love to hear what project above is your favourite!!
Until Next time...
Happy Creating!
*Working for Scrap-N-Art online magazine!
*Designing for DCWV
*Continuing on with Imagine Crafts
*Another term with Spellbinders
*Design team trip to Phoenix AZ with my Spellbinders peeps!
*Some awesome publications, including a couple of covers!!
It was also a year of change creatively for me. I stepped down from all of my design team commitments except for Spellbinders. I was burnt out. Never thought that would happen... but it did. I really needed a break! So beginning in June, I created only for Spellbinders.
Now, my work for Spellbinders ended with 2015. I will miss it SOO much! I adore Spellbinders products and will be forever thankful for the amazing opportunity to design for Stacey Caron!! She is so special to me! She gave me the opportunity of a lifetime... She made us feel like we were family... Getting to hang out with the design team in Phoenix was so special. We got to know everyone on a personal level. That is what made this company unique. Spellbinders is what it is because of you Stacey...
I wasn't sure what would happen once I was finished with all of my commitments. I was afraid I would loose my desire to create. Didn't know if perhaps it would be the beginning of the end for me...
But i am so happy to say that it's not!! I have been working on organizing my studio, and I'm SO excited about this new freedom I have!! I can create WHATEVER I want, using WHATEVER I want... WHENEVER I want!! It's a very strange feeling... but very liberating! !I look forward to getting back to my roots... to scrapbooking! i enjoy the paper crafts, DIY and cards, but Scrapbooking is my passion!!
Now, that doesn't mean I will not be applying to some awesome teams... I still ADORE working for companies... just sayin'... Hoping for some AMAZING opportunities to come my way in 2016!!
I'd like to share some of my 15 favourite projects from 2015... In no particular order...


Wow! That was so hard to decide! So much variety! so much fun!! There are a few others that I'd like to add, but they are using new product by Spellbinders, so I can't share yet! ;)
Thanks for joining me on this look back thru 2015!! I'd love to hear what project above is your favourite!!
Until Next time...
Happy Creating!
Saturday, January 02, 2016
One little word for 2016... Progress
Hello!!! Wow, has it really been so long since I've blogged??? Time sure flies!!
It's been a great break, but I'm looking forward to returning to my blog some!!
So much has changed since I last blogged in May!! As of yesterday, I'm a free woman! I no longer am designing for any design teams! Such a strange feeling!!! Kind of looking forward to doing some designing for me. I haven't done that in a very long time!! It's kind scary too! I absolutely LOVE designing on teams, but I guess change is a good thing. It's all what we make it, right? So here's to having some creative fun in 2016!!!
 Speaking of 2016... I have chosen my word for the year...
~PROGRESS~
I often make changes and expect it to happen overnight. So this year, my goal is to make small changes regularly, so that in the end, there are great results!!
Blogging is one of those things!! I will certainly not start blogging daily... (ha!) but I will be trying to do better. Progress, right?? ;)
There are so many areas in which I want to see progress this coming year. I have looked back on 2015 to see where there has been progress... there certainly has been lots! And it inspires me to work on seeing MORE progress in this coming year!!
*Progress in my journey to a healthier me. In 2015 I have worked hard to loose over 25 lbs. I am still working hard to become more fit and healthy. Healthy eating habits and healthy fitness goals. I want to continue to progress in 2016!!
*Progress in my home. I want to continue to de-clutter, organize and renovate! Every little thing done is progress!!
*Progress with my relationship with my kids... Being a mom to a teenage girl isn't easy... I want to continue working on our relationship. And 4 boys... one beginning middle school in the fall. I want to continue working on being the Mom they need me to be.
*Progress in my marriage. I could say it's perfect now... but who am I kidding!?! Marriage is hard work. At least for HIM it is! I'm not always the easiest person to live with, I'm sure. i need to work on being the best ME I can be... so our marriage is stronger. I adore my hubby and am so blessed to have him in my life!!
*Progress in my spiritual walk. I am so inconsistent in my bible study and prayer. I pray that I will grow stronger in my faith this year and that God will help me to see progress in my time with Him.
*Progress in my creative journey. I am at a very special place in my creative journey... a place of total freedom. And while I adore my design team work, I need to embrace this time and see where it leads me! I have already begun Bible Journaling... something very new to me!
*Progress..... the journey is never ending!!
Thanks for stopping by... I know I'm a stranger now. :) But I look forward to spending more time here again... to see where this journey of 2016 takes me... takes us!
Tune is again soon to see my reflections on 2015... some of my favourite projects and favourite moments!
Until then...
Happy Creating!!
 Speaking of 2016... I have chosen my word for the year...
~PROGRESS~
I often make changes and expect it to happen overnight. So this year, my goal is to make small changes regularly, so that in the end, there are great results!!
Blogging is one of those things!! I will certainly not start blogging daily... (ha!) but I will be trying to do better. Progress, right?? ;)
There are so many areas in which I want to see progress this coming year. I have looked back on 2015 to see where there has been progress... there certainly has been lots! And it inspires me to work on seeing MORE progress in this coming year!!
*Progress in my journey to a healthier me. In 2015 I have worked hard to loose over 25 lbs. I am still working hard to become more fit and healthy. Healthy eating habits and healthy fitness goals. I want to continue to progress in 2016!!
*Progress in my home. I want to continue to de-clutter, organize and renovate! Every little thing done is progress!!
*Progress with my relationship with my kids... Being a mom to a teenage girl isn't easy... I want to continue working on our relationship. And 4 boys... one beginning middle school in the fall. I want to continue working on being the Mom they need me to be.
*Progress in my marriage. I could say it's perfect now... but who am I kidding!?! Marriage is hard work. At least for HIM it is! I'm not always the easiest person to live with, I'm sure. i need to work on being the best ME I can be... so our marriage is stronger. I adore my hubby and am so blessed to have him in my life!!
*Progress in my spiritual walk. I am so inconsistent in my bible study and prayer. I pray that I will grow stronger in my faith this year and that God will help me to see progress in my time with Him.
*Progress in my creative journey. I am at a very special place in my creative journey... a place of total freedom. And while I adore my design team work, I need to embrace this time and see where it leads me! I have already begun Bible Journaling... something very new to me!
*Progress..... the journey is never ending!!
Thanks for stopping by... I know I'm a stranger now. :) But I look forward to spending more time here again... to see where this journey of 2016 takes me... takes us!
Tune is again soon to see my reflections on 2015... some of my favourite projects and favourite moments!
Until then...
Happy Creating!!
Friday, May 08, 2015
Scrap N'Art Mag April Issue Sneak Peeks Pt 2
Oh my!! Where did April go???? LOL! I need to be sharing my MAY sneak peeks!! But I will finish April's first!!
Ok, here we go!! These projects can all be found in full in the April issue of Scrap N'Art Online Magazine! Click HERE to subscribe!!
Use Your Stash:
Each issue has an article where we can create ANYTHING we want, as long as we use product from our sponsors!! Here is what I created... well, a sneak peek of it... Stop by this issue to see more, and to see what the rest of the team created!! Check it out here...

PRIMA; Mix It Up
One of our fabulous sponsors for April was Prima Marketing!! SWOON!!!!! I ADORE Prima, and of course, had an amazing time creating with their product!!
This is a sneak of a mixed media Reverse Canvas that I created using their product. Check it out here, along with the others on the team created.

Jewellery Making To the Extreme
DIY Jewellery making is on the rise!! I had SO much fun creating this piece for the issue using some gorgeous Spellbinders "A Gilded Life" Supplies. See details of this and what the others created here.

Prima: Banner Mini Album Video Tutorial
For my final sneak peek, I am sharing a mini album that I created, again using the fabulous product supplied by Prima Marketing! Full video tutorial supplied for this project here!
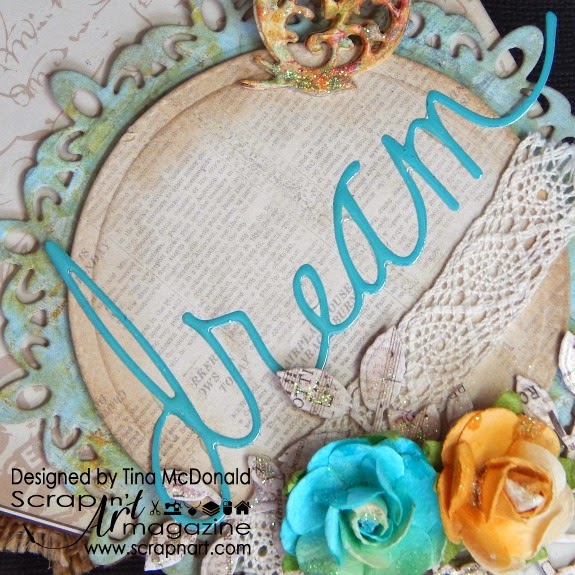
And that, my friends is the April issue!! A-MA-Zing!!!
If you are not a subscriber, what are you waiting for!?!? Be sure to check it out!!
Now, time to start getting the May Sneak Peeks ready!! :) Come back soon for those!
Until then... Happy Creating!!
Tina
Ok, here we go!! These projects can all be found in full in the April issue of Scrap N'Art Online Magazine! Click HERE to subscribe!!
Use Your Stash:
Each issue has an article where we can create ANYTHING we want, as long as we use product from our sponsors!! Here is what I created... well, a sneak peek of it... Stop by this issue to see more, and to see what the rest of the team created!! Check it out here...

PRIMA; Mix It Up
One of our fabulous sponsors for April was Prima Marketing!! SWOON!!!!! I ADORE Prima, and of course, had an amazing time creating with their product!!
This is a sneak of a mixed media Reverse Canvas that I created using their product. Check it out here, along with the others on the team created.

Jewellery Making To the Extreme
DIY Jewellery making is on the rise!! I had SO much fun creating this piece for the issue using some gorgeous Spellbinders "A Gilded Life" Supplies. See details of this and what the others created here.

Prima: Banner Mini Album Video Tutorial
For my final sneak peek, I am sharing a mini album that I created, again using the fabulous product supplied by Prima Marketing! Full video tutorial supplied for this project here!

And that, my friends is the April issue!! A-MA-Zing!!!
If you are not a subscriber, what are you waiting for!?!? Be sure to check it out!!
Now, time to start getting the May Sneak Peeks ready!! :) Come back soon for those!
Until then... Happy Creating!!
Tina
Monday, April 20, 2015
Scrap N'Art April Issue sneak peeks Part 1
Hello all! I hope that all is well! Today I am here to share with you a few sneak peeks for the April issue of Scrap N'Art Online Magazine!! We had the opportunity to work with so,e fabulous sponsors, including Prima Marketing, Heartfelt Creations, Kaisercraft, Spellbinders, Imagine Crafts, Beacon Adhesives, Westcott, May Arts and more!! These companies are so incredibly generous, and I want them to know much I appreciate their support, and how much I have LOVED working with their


Products!!
Ok, enough talk, time to share some sneaks...
Kaisercraft Shabby Chic Card Set
This next sneak peek is for a Watercolor Techniques card set, featuring Imagine Crafts!!
Watercolouring with Imagine Crafts featuring Tsukineko
Baby Blessings Card featuring Heartfelt Creations
And that is the April Issue Sneak peek,Part one!!
Come on back on Wednesday to see Part 2, featuring some yummy Prima goodness, Spellbinders Jewellery and more!
Thanks so much for stopping by! I would love to hear your thoughts on these projects, or on the Magazine itself!
And I also finally figured out how to add a "reply" button to my comments, so I will be looking forward to chatting with you and answering any questions you may have, right here in the comments section! Yay!!
Until next time, Happy Creating!!
Wednesday, April 15, 2015
Home is where you are... Featuring Spellbinders
Neighbourhood Glance is an adorable new die set just reeled from Spellbinders. Today, I will show you how to use it on a scrapbook page and add lots of layers, depth and dimension. After they have been cut, I coloured them using Chameleon Alcohol markers to bring them to life!!
But to see the entire project, with full instructions, you will have to stop by the Spellbinders blog... because here I'm only giving you a sneak peek!! :)

Spellbinders Supplies:
- S4-437 Royal Flutter
- S4-514 Neighbourhood Glance
- SCD-010 Build-a-Tag One
- SCP-014 Cuddle Cream
- Spellbinders® Artisan X-plorer Die Cutting and Embossing Machine
Cross Promotional Partner Products:
- Beacon Adhesives™, Inc.: 3-in-1 Advanced Craft Glue
- Chameleon Pens: Color Tones Alcohol Pen System
- Cosmo Cricket™: Tiny Text
- Imagine Craft Featuring Tsukineko: irRESISTible Testure Spray; Black Tuxedo
- May Arts: Ribbon
- Scrapbook Adhesives by 3L: Small Foam Squares, Foam Tape
Other Supplies:
Patterned paper; Scissors, Hole punch, Black pen, Cardstock (black, white), Stickers, Wood embellishments, Decorative clothes pin, White cardboard
This set of dies is so much fun! It is so versatile and can be used in so many types of projects! Off the top of my head I'm thinking of themed projects saying "Welcome Home", "Welcome to the Neighbourhood", "Missing You Here", Housewarming gifts... endless possibilities!! In scrapbook pages, cards, party decor...
Thanks so much for stopping by today!!
Until next time,
Happy creating!!
Friday, April 10, 2015
Smile! Life is Awesome!!
Hey all!! How's the weather? Has the warmer temperature reached you Yet?? If it has, send it my way! I'm freezing!! LOL!!
A few weeks ago I had the honour of attending Scrapbook and Cards Today's CROP AND CREATE event on Moncton! To say it was fabulous would be an understatement!! It totally rocked!! I was able to help out in 3 classes for Spellbinders taught my Kim Hupke and Mrs Spellbinders herself, Stacey Caron! It was SOOO much fun to be in the classroom with them! Let me just say that the students left VERY happy!! :)
While there I also had a little bit of time do create myself. So I dug out my new DCWV DIY Project Stack. But I did not create a project, as in this post here. But I did use the papers (gorgeous!!) to create this fun layout!! I love that this stack is SO extremely versatile!! Projects, cards or layouts! Anything you desire!!

Supplies:
That's it for today! Thanks for stopping by!! Been SO busy creating! Having SOO much fun! Have you been by ScrapN'Art Magazine online?? It's AMAZING over there! SO much talent, so many awesome sponsors, and so many styles! Go check it out!!
Until next time...
Happy Creating!!
A few weeks ago I had the honour of attending Scrapbook and Cards Today's CROP AND CREATE event on Moncton! To say it was fabulous would be an understatement!! It totally rocked!! I was able to help out in 3 classes for Spellbinders taught my Kim Hupke and Mrs Spellbinders herself, Stacey Caron! It was SOOO much fun to be in the classroom with them! Let me just say that the students left VERY happy!! :)
While there I also had a little bit of time do create myself. So I dug out my new DCWV DIY Project Stack. But I did not create a project, as in this post here. But I did use the papers (gorgeous!!) to create this fun layout!! I love that this stack is SO extremely versatile!! Projects, cards or layouts! Anything you desire!!

I die cut most of the papers using Spellbinders Standard Circles small and large. I nested them all together to create the rings. I think this is one of my favourite techniques... like, ever!! I also added lots of little extras on here to coordinate with the papers... I had a few little strips of other patterned papers in black/white stripes, some wood embellishments and frame, Foam squares to add dimension to some of the circles, Enamel dots, a stamp and of course, some splats using Imagine Crafts irRESISTible texture
And wanna hear something funny?? I went to an all weekend crop and forgot to bring... PHOTOS!!! I did not bring a single picture with me! Dummy me! LOL! So I was so thankful when Stephanie and Tracy saved the day with their Instax printers! Thank you ladies! So I got these cool mini polaroids to scrap with! Totally cool! :)
Supplies:
- DCWV: DIY Project Stack (Birds and Butterflies)
- Spellbinders: Standard Circles Sm, Lg
- Imagine Crafts Featuring Tsukineko: irRESISTible Texture Spray: Black Tuxedo
- Cosmo Cricket: Text Stickers
- Teresa Collins: Nine and Co wood pieces
- MME: Enamel dots
- Heidi Swapp: Stamp
- Fancy Pants: Diecuts
- Scrapbook Adhesives by 3L: Adhesive runner, Foam squares
That's it for today! Thanks for stopping by!! Been SO busy creating! Having SOO much fun! Have you been by ScrapN'Art Magazine online?? It's AMAZING over there! SO much talent, so many awesome sponsors, and so many styles! Go check it out!!
Until next time...
Happy Creating!!
Saturday, March 28, 2015
DCWV-Tombow USA Blog Hop- Day 2
Hi and Welcome to the Gold and Cork Blog Hop with Tombow USA and DCWV!

We have 2 days full with gorgeous projects using GOLD and CORK! You probably came here from Lisa Lahiff's blog but if you happened to stumble across my blog go to the DCWV Blog to start!

For my project today I created a scrapbook page. I used the The DCWV Gilded Stack, a 4x4 Cork Stack. I adore the patterns and colours in this stack! The background is the reverse side of one of the papers, so it's actually double sided!
To adhere my rings down, I used the Tombow Mono Multi Liquid Glue. The layers are all held down with Tombow Xtreme Adhesiver. This adhesive works amazingly!! It does really well with the cork layers as well!! And finally I used the NEW Tombow Foam Tape to adhere my photo and give a bit of depth to my page. I LOVE layers and dimension, and this adhesive helped me to achieve that!


***********************************************************************

To win, visit and comment on the participating blog posts. You have until March 31st at 11:59 EST to comment. A winner will be picked randomly and announced on April 1st 2015.
Tombow will be giving away: Tombow Xtreme Adhesive, NEW Tombow Adhesive Dots, NEW Tombow Foam Tape and everyone’s favorite the Tombow Mono Multi Liquid Glue!
DCWV will be giving away: The DCWV Gilded Stack, a 4x4 Cork Stack, Insta Kraft Album, Accordion Album and a set of Birthday Photo Props!
Here is a list of todays participants... in case you have missed any!
Remember to “Like” Tombow USA and DCWV on Facebook.
Thanks so much for stopping by!!
Until Next time...
Happy Creating!!
Subscribe to:
Posts (Atom)




 Posts
Posts


